MP Street
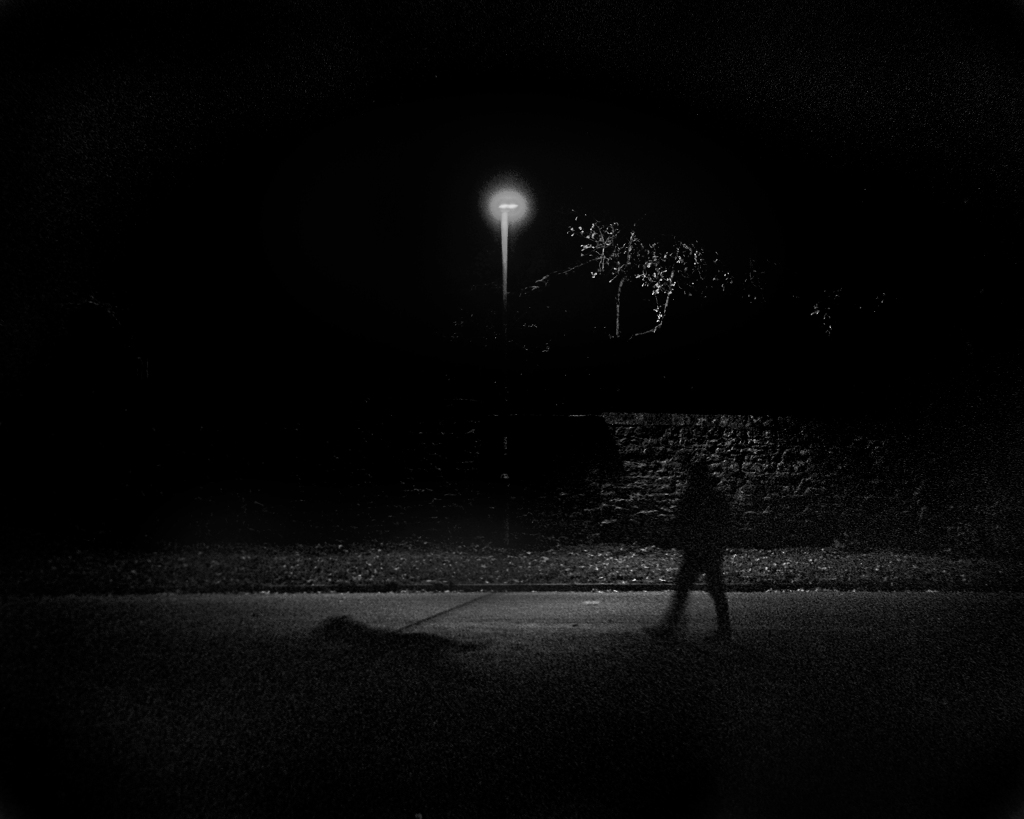
A few more pics from the MP – 35 lux – TriX combo. Shot in Oxford last week.
I also have another test roll to develop, hopefully with some new project images – a test because using Ektachrome slide film and the internal meter: I’m sure there’ll be a ton of exposure errors but hopefully some good pics.
In this vein, one further slight critique of the system is that the aperture ring on the lens is quite loose – this is a widely reported point. Not a big deal but sometimes I find the ring move from 1.4 to 2 when shooting wide open; just something to watch/feel for.
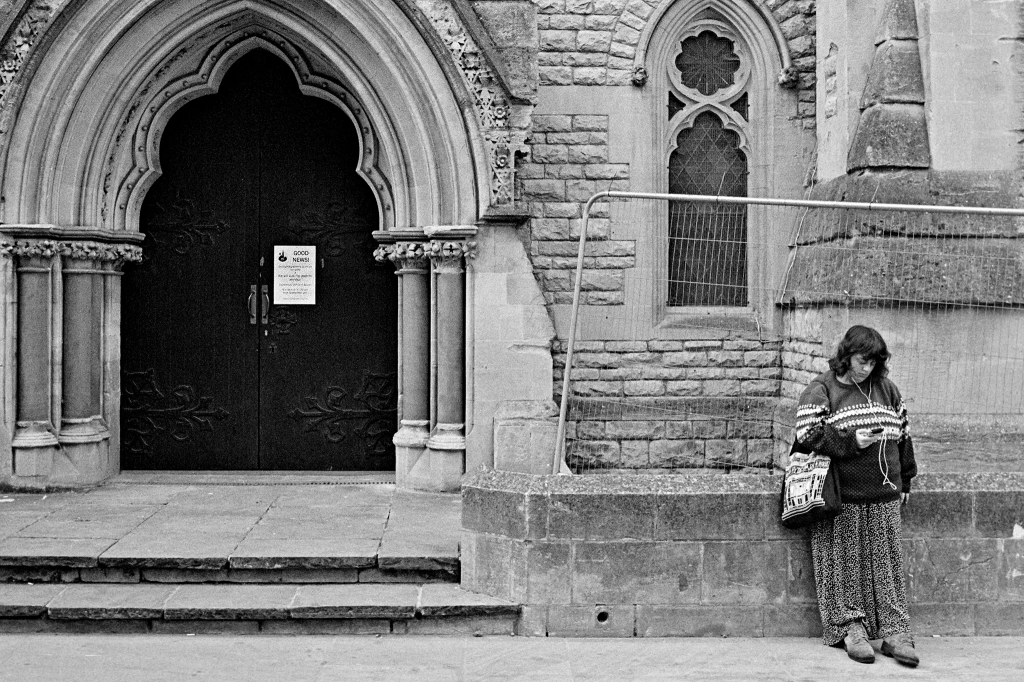
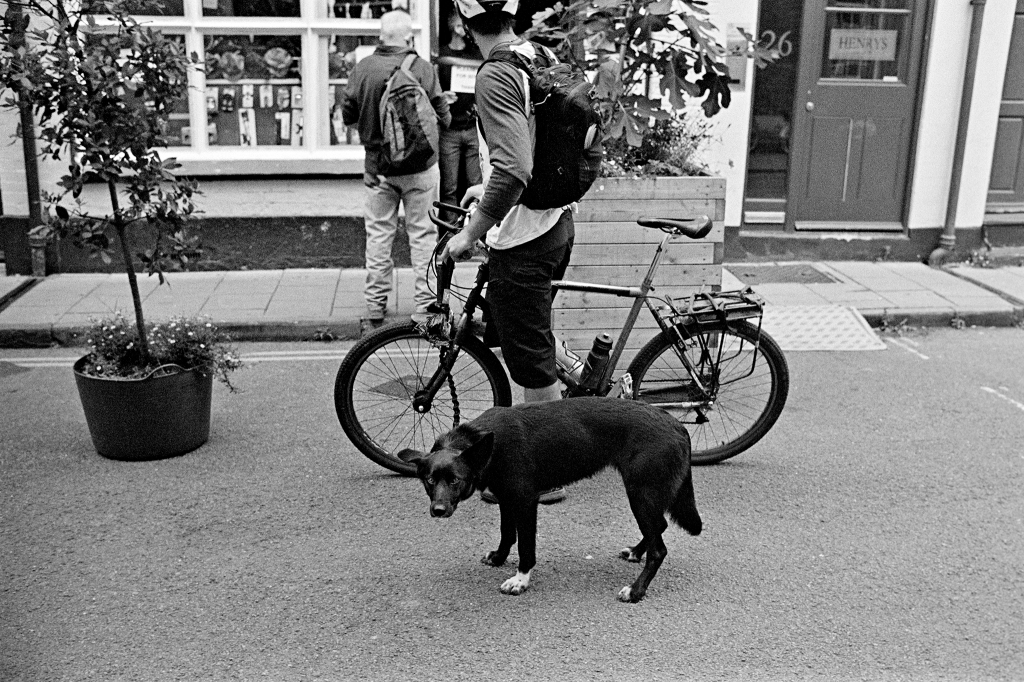
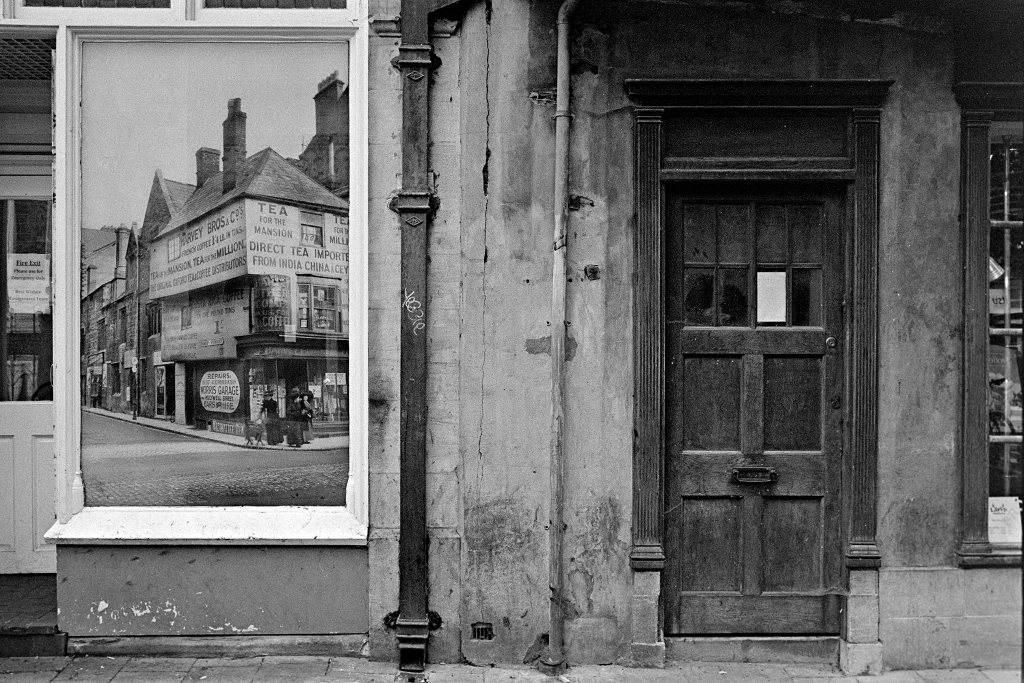

Leica MP and 35mm Summilux f/1.4 ASPH
Leica MP and 35mm Summilux f/1.4 ASPH
Quick discussion/initial thoughts. First B&W test pics below.
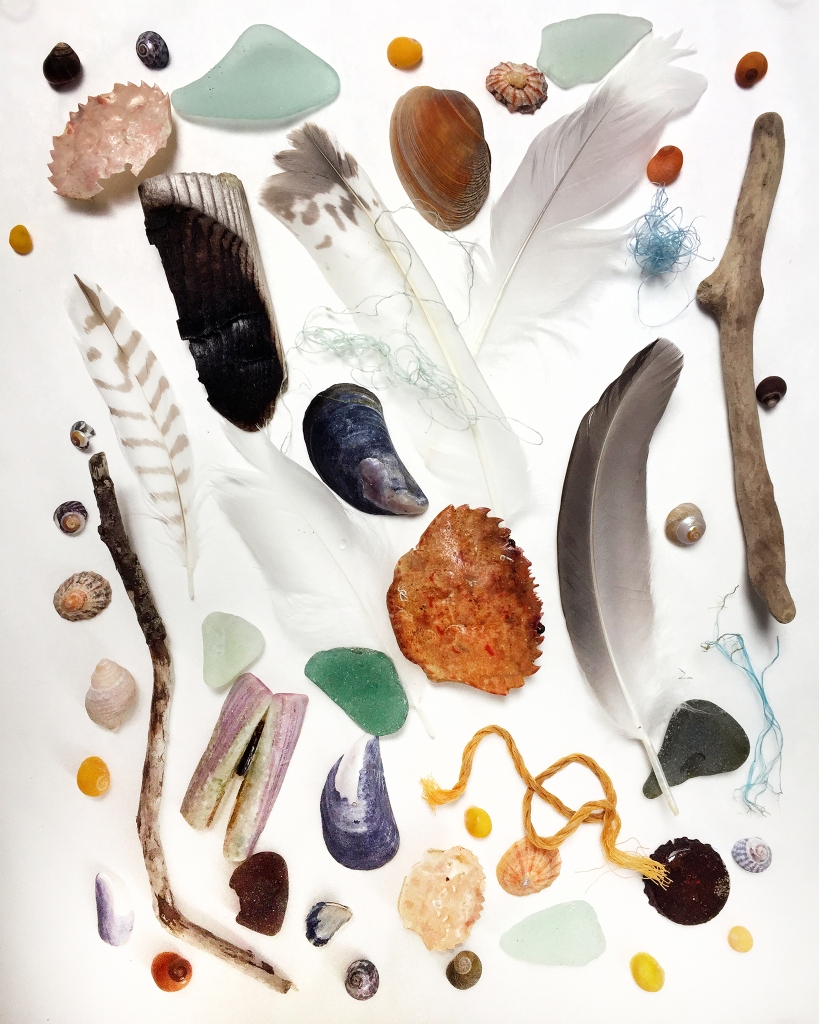
Quick pop-up from a beautiful if rather windy Scotland. 10×8 photography outdoors on hold, but beach-combing and still-life macro a wonderful (fingers crossed) diversion.
Two days of beach-combing on three local beaches (one in walking distance from our sheep-farm holiday cottage): shells, glass, wood, feathers, nylon rope, odd bit of metal.
Sorted into labelled Tupperware and quickly washed to remove sand and air-dried.
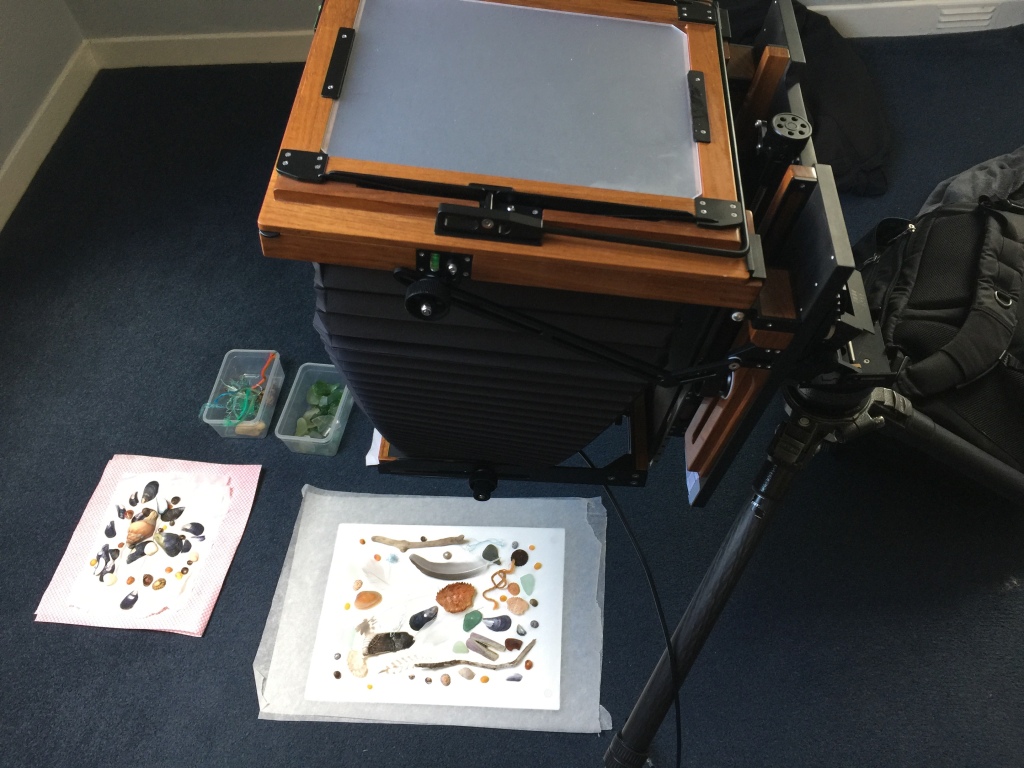
Odds and ends sourced locally to produce solid still-life background – pound shop glass chopping board and two sheets of baking paper; natural light from upstairs windows.
Chamonix 810V with Rodenstock Apo-Sironar S 240mm f/5.6, 440mm bellows extension, about 550mm working distance, some front tilt and front shift for focus and composition. (Setting up the camera, even with ballpark measurements for subject size, still took about 30mins).
2 sheets exposed at f/45, one on Fuji Velvia 50 for 54 seconds and one on Kodak Portra 160 for 20 seconds.

Result!
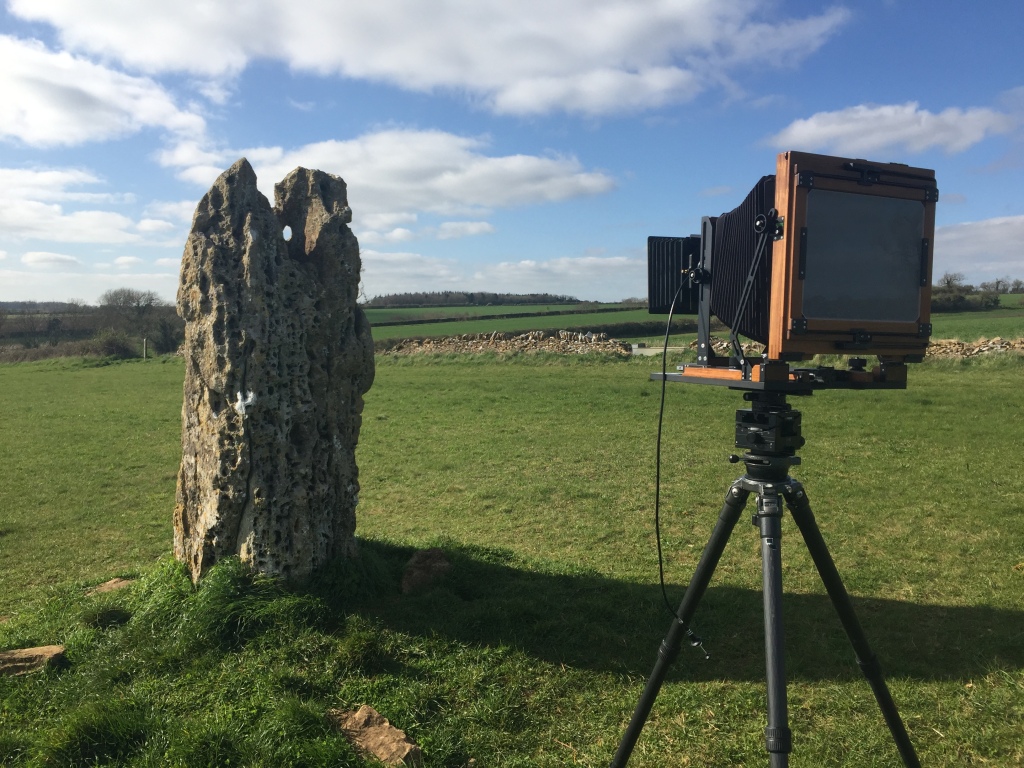
Result! One from Tuesday evening, portrait of Hawk Stone, Oxfordshire.
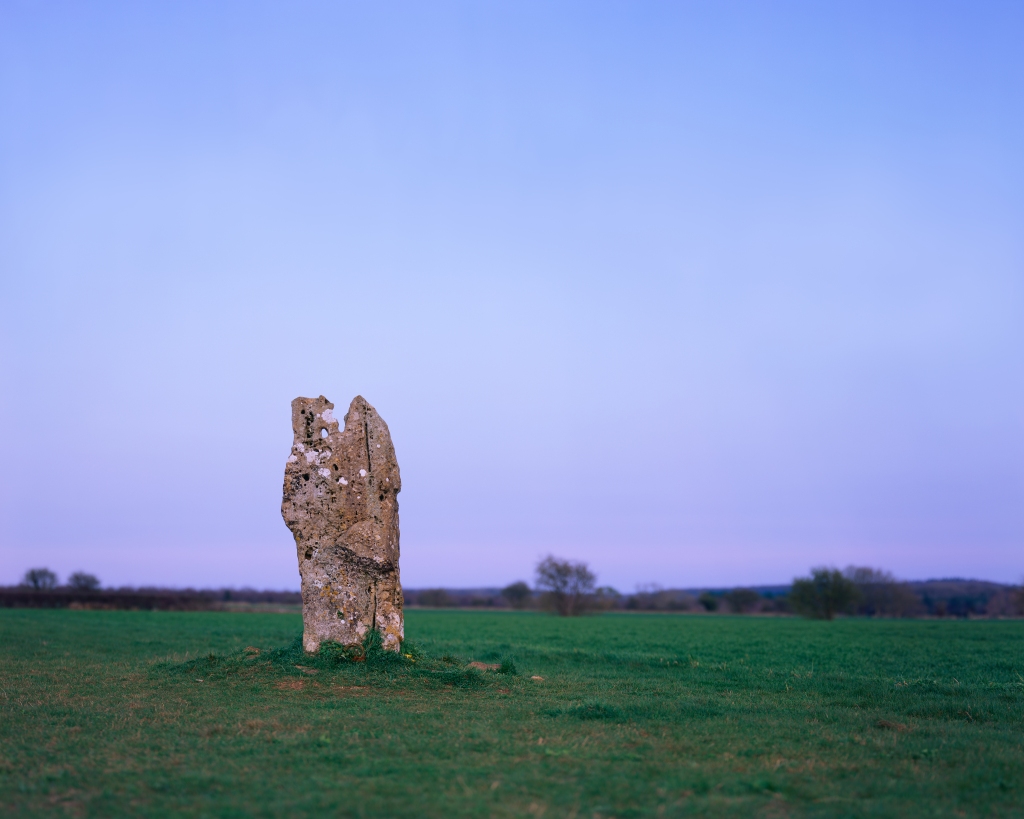
30.03.21, 7.05pm
Chamonix 810V, Nikkor-M 450mm f/9
Fujichrome Velvia 50
1/4” f/9, 45mm front rise
Lee 0.6 Hard Grad
Bellini E6, Jobo 3005 expert drum on manual roller base
(40ºC waterbath, FD 7’10”)
Epson V850 / Silverfast (original scan 1600dpi for ±180mpx file)
Overall pretty delighted with this. Velvia has enlivened what was a pretty flat sky, and even with that vast expanse of flat colour that showed up all the errors in my processing technique (a few streaks and waves suggesting I do need still to hone my rotation with the jobo drum), the spotting took far longer (too many hairs on my film today, for whatever reason! Have just processed 3 more sheets, this time Portra 160 in Bellini C41. First two in Jobo 3005, third in Stearman Press SP810 tray (sheets 11-12, and sheet 13, of the 16-sheet limit of the Bellini Kit.
New home-developing notes for 10×8 sheet film
After many months of not being able to get out to expose 10×8 film, I’ve now made two outings in the last few days, and using the opportunity to progress with my setup and equipment.
FIrst, I’ve been able at long last to expose some of the new Portra 160 I bought three boxes of a while back.
Second, I’ve taken my home developing, inc. of colour, to the next level, by purchasing a Jobo 3005 expert drum and Jobo 1509 manual roller base (and the pump needed to remove the lid safely).
My home developing with 10×8 has thus progressed from BTZS tubes (which I still have but haven’t used in over a year) and two Stearman Press SP810 trays. The latter are brilliant and a huge improvement over the BTZS tubes for ease of use in a minimal home setup (NB I don’t have a darkroom or even, particularly, the opportunity to set one up).
The Stearman trays work perfectly for both B&W and colour following some experimentation, and are especially useful for B&W when you have two different development times for a couple of sheets.
However, esp. for E6 colour with the Bellini 6-bath chemistry I now use, where the overall processing time not including setup is about 45mins, the Stearman trays thus have their limitations if you have multiple sheets to process – even two sheets, with two trays, takes up a whole evening.
Last night I processed all three of my exposed sheets of E6 Velvia 50 in one go in the Jobo 3005 (which can take a total of 5 sheets). Tonight or tomorrow I will aim to process the Portra 160.
The expert drums are really designed to work on the large Jobo CPP processors: sadly my processing area and wallet are both too small to allow for such a monster. But all is not lost, as long as you understand the process and do your research (via e.g. Youtube, blogs, and LFPF). Fingers crossed, I seem to have developed the E6 sheets in the new Jobo tank at least as well as in the Stearman trays (or in smaller Jobo inversion tanks for 120/35mm).
Now that I have my waterbath setup resolved for both C41 and E6, adjusting to the Jobo 3005 is a matter of getting comfortable with manual rotary processing rather than sloshing/inversion, and setting up a rig to get the chemistry into the drum when horizontal.
Both of these are very important for even developing: the bonus of the Jobo is the minimal chemistry it requires to process the sheets, but this comes at the cost of needing to ensure that the chemistry engages with the sheets evenly throughout – this rules out pouring in the chemistry from the top, for instance, as with smaller tanks for 35mm and 120. The expert drums have an internal design completely different from all of Jobo’s other tanks: the 3005 has five internal tube chambers, each carefully designed to allow chemistry to reach both sides of the film for developing, and thus the tank also fills in a way slightly differently from the other jobo tanks, with a modified lid baffle. So ensure the work surface you are processing on is as level as you can get it. I got this to work pretty well just with the basic Jobo 1509 manual roller base, by adjusting the level of one end by different thicknesses of dish cloth.
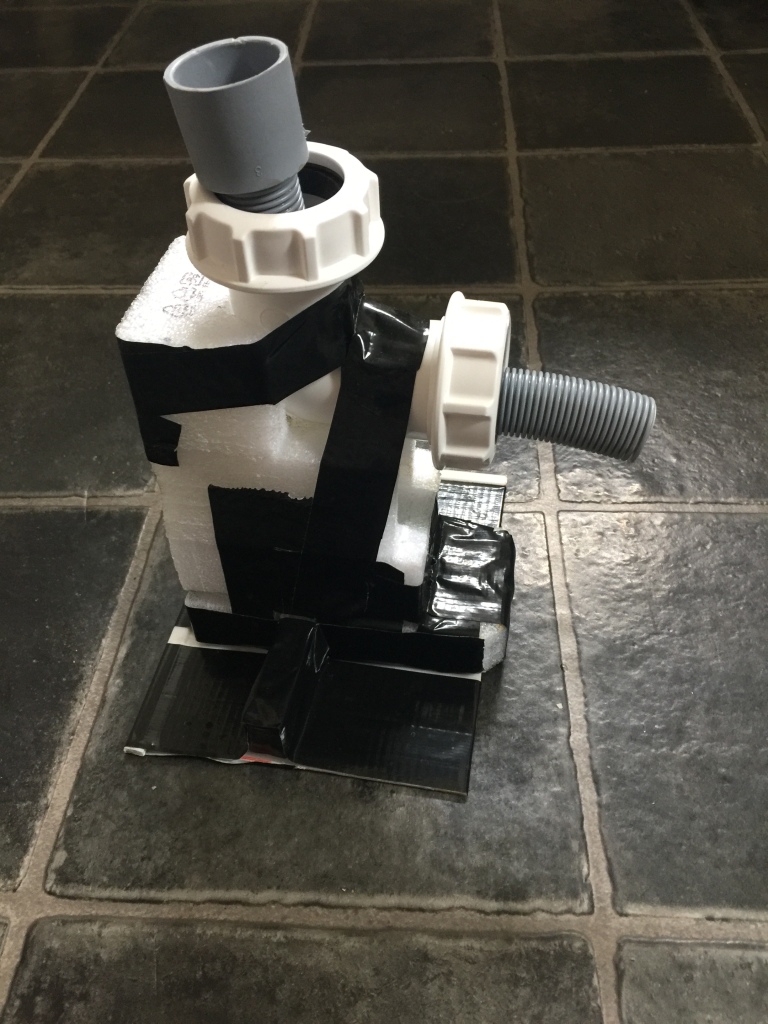
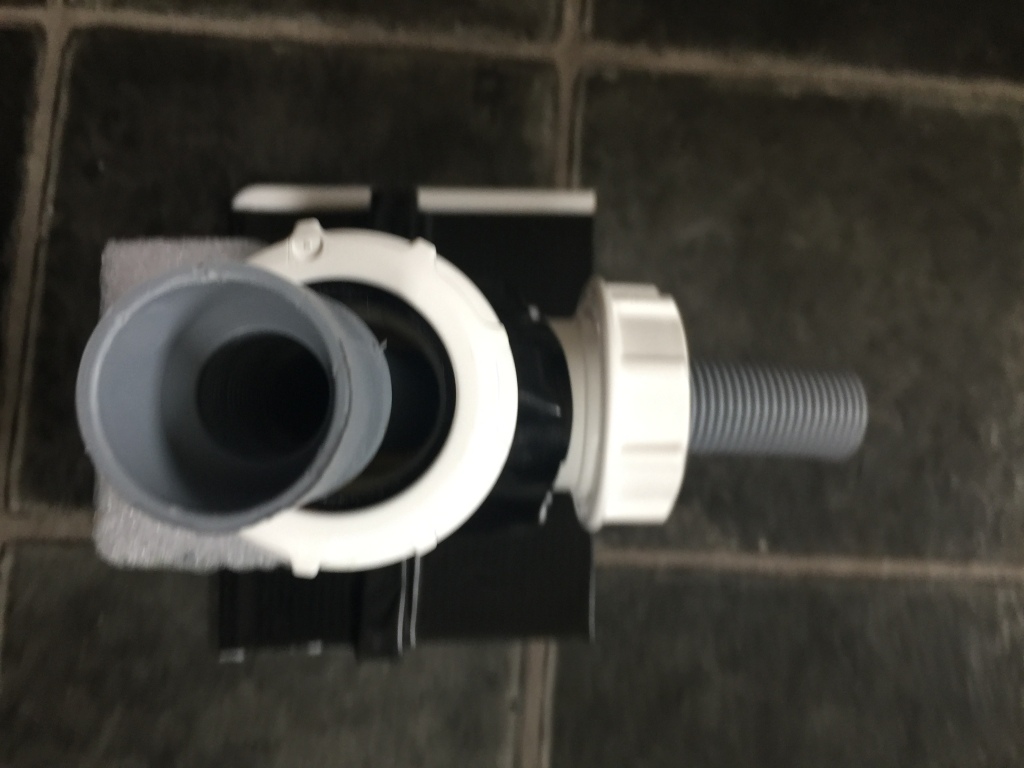
The equipment you’d need to get the chemistry into the horizontal tank calls for a bit of ingenuity but not any particular tools, and could be very easily assembled from packaging and some plumbing pipe, and again a bit of figuring out. I went with a washing machine waste hose cut to length, pushed though a waste elbow joint, held perpendicular at the right height by packing material from a laptop box cut to the right shape and then gaffer-taped together. The entry width of the Jobo cog lid is 1inch, so a tube that is smaller than this in diameter will be needed to allow the tube to pour chemistry into the lid while the tank is rotating. The washing machine waste hose is flexible plastic, easily cut to size, and of a large enough bore to allow the chemistry to be poured into the tank relatively quickly without the need for a funnel – for colour chemistry you need to try to maintain the temperature so too many other bits of plastic in the way risk cooling it too much.
Chemistry volumes, drain times, and rotation method/speed.
I found that the 3005 tank takes 20 seconds to drain 600ml chemistry, the amount I plan to use for colour (I will need a full litre for B&W because of higher dilution) – I have the full litre of each step made up and decant from brown plastic/glass bottles to clearly labelled Jobo pouring bottles.
Although the 3005 can take five sheets, a max of four is a good idea because, at least for the Bellini kits, you have to extend some of the times after four sheets/films because of chemistry exhaustion (the Bellini E6 kit lasts for up to 8 sheets/films; the C41 up to 16). I was able to pour the 600ml of each lot of chemistry carefully into the tube in about 20seconds, pouring from the Jobo bottle with my right hand while carefully rotating the tank with my left. The FirstDev time is critical for exposure, so you have to time precisely from the moment you start pouring the chemistry in to the moment the first wash water comes into contact with the film: this is why it’s important to know the drain time of the Jobo tank (so you know when to take it off and start draining the developer, ready for the water to enter when the timer goes off – as usual, I am using the excellent Lab Timer app on my phone). The timings for the remaining steps are not critical if you go over, because the other chemicals do not continue to work after their allotted times.
Because I have my water bath at 40ºC, use a 1minute 40ºC water prewash before the first developer, and am confident of the thermal profiles of both the Stearman and Jobo equipment, I haven’t adjusted my developing times at all.
Rotation method: after carefully rotating when adding chemistry, I spin the tank quite rapidly ten times in each direction, going past a full rotation each time: thus perhaps about the 50rpm the automated setup seemingly achieves). Rotating in each direction, and being conservative by using a larger volume of chemistry than the minimums, guards against uneven development.
Other notes from my first go:
Loading: the 3005 is comfortable to load up in my Harrison Jumbo tent, though this is done with the tank horizontal. You then set up the tank vertically, with the tent on a firm surface, to press the lid on as evenly as you can.
Final wash and stabiliser: for the last tap water rinse before stablizing, remove the lid of the tank with the pump. The tank with lid on will not fit under the mixer tap of my kitchen sink with lid on, but does just fit with lid off.
For the stablizer step: here I’ve I think gone with Bellini’s own recommendations. I premix a big batch of stabiliser by removing 50ml distilled water from a 5litre bottle and adding 50mm of the concentrate. During the final running-water wash of the film in the tank, I pour 500ml of the stabiliser mix into a jug and then pour into a white washing-up bowl (white allows me to see the colours in the film). When the washing time in the sink is over, I remove the film carefully while the water is still in the tank, and then put all the sheets in the washing up bowl stabiliser. For the first minute, I agitate constantly, rotating the sheets. After the first minute, I then discard this first 500ml, then repeat a further three times without agitating, but rotating the sheets a few times. I will probably do the same for C41 stabiliser. Too much agitation produces too many bubbles, which you don’t want to have dry onto the film. I then hang to dry overnight; I have been toying lately with the idea of a film dryer to speed up this step as well.
Fingers crossed for C41 and B&W; will hopefully post some images/results once the sheets are scanned.
Meanwhile, here are a couple of pics of my Heath Robinson pouring rig. The basis of it is a plumbing waste pipe elbow connector, gaffer-taped to a piece of LDPE packing material from a laptop box, measured and carved to fit with a knife, then gaffered to a waste piece of plastic as a base. It’s quite light but stable, and the neck of a jobo pouring bottle can be made to touch the top of the washing machine hose tube to add further stability to the pour when your other hand is rotating the Jobo tank.
Update:
The pouring rig works well, but I will start using a funnel to avoid drips and to allow a more constant pouring speed and rotation speed. This seems especially important with C41: the first of the two sheets in the Jobo tank that I have scanned had some fairly drastic streak marks, and an uneven rotation speed may be partly to blame. Another solution I’ve read of on the LFPF is that 2x one-min pre-washes at the start of the process may be needed (currently I only do one). The rationale for this is that the pre-wash softens the emulsion and allows the chemistry to have more immediate impact. This is even more important with C41 than E6 because the important developer stage is only half as long with C41.
One further note: my recent C41 sheets, two in the Jobo and one in the Stearman, all exhibit fine scratches length-wise along the sheets, visible at 200% after scanning. I’m pretty sure this must be to do with the stabiliser step, and I think the white washing-up bowl I use for stabizer may have a rough section. I’ll either sand this down, or get a dedicated 10×8 paterson tray for the purpose. I’ve never experienced this with any other film sizes I’ve home processed (135 to 5×4) so this may be the culprit.
Hindsight into Breathturns
The meanings in 2020: Images and Beyond
After the Ritual
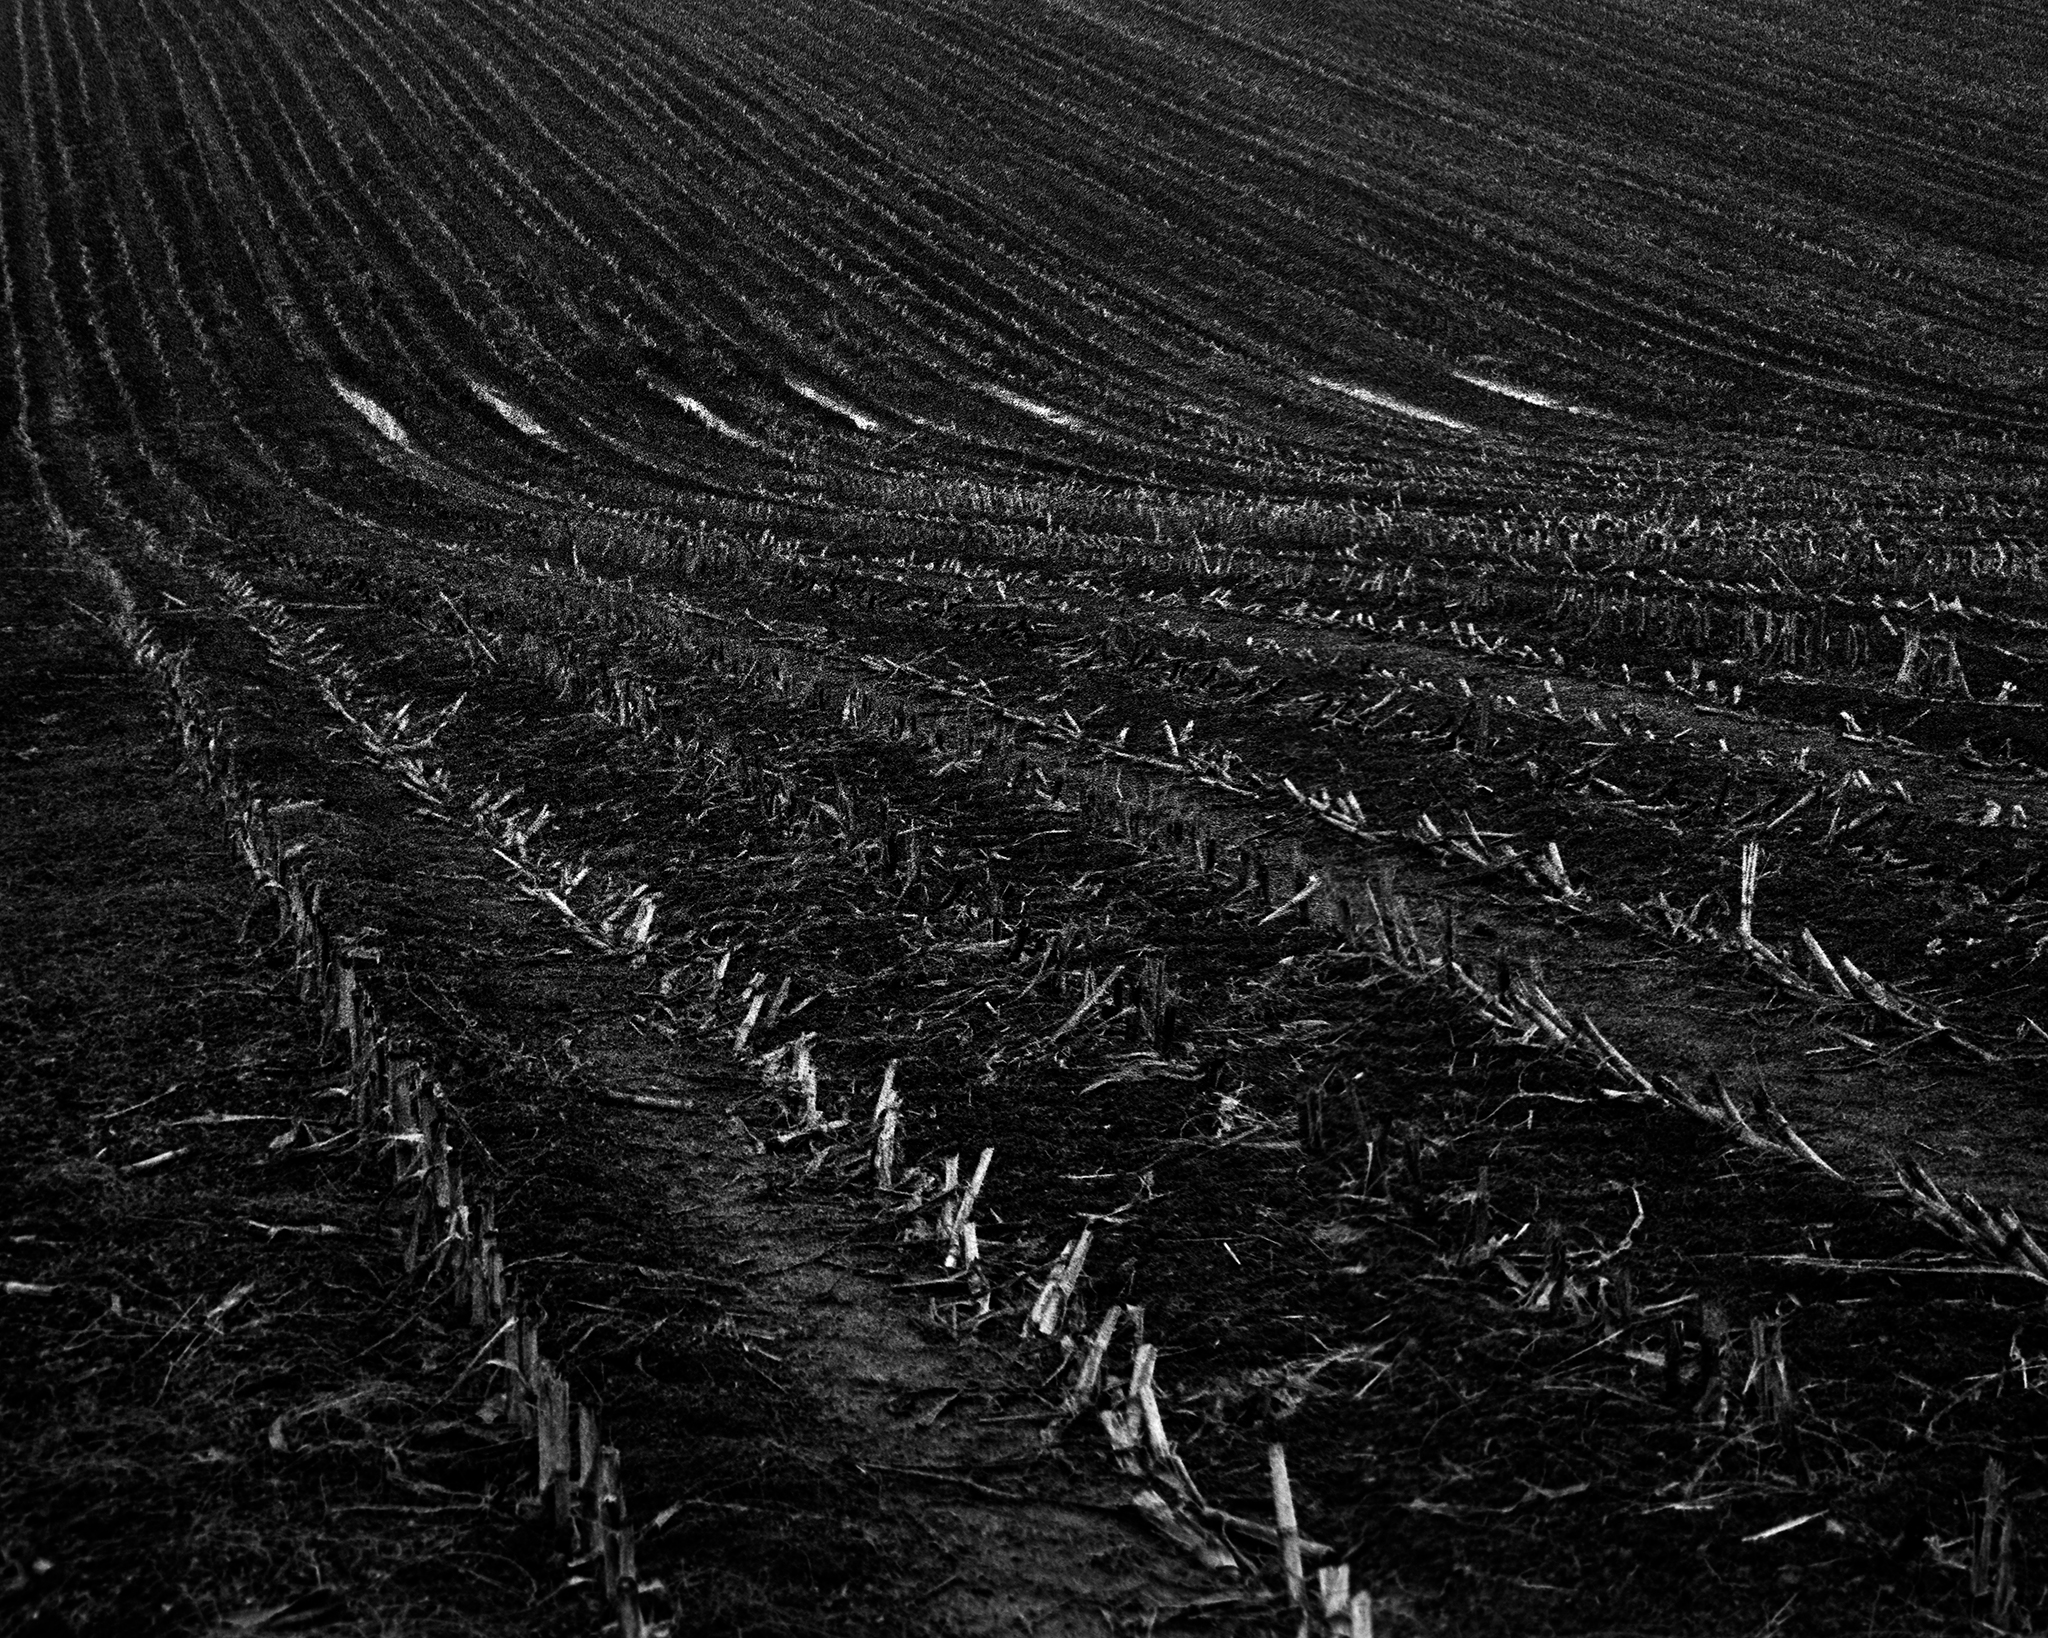
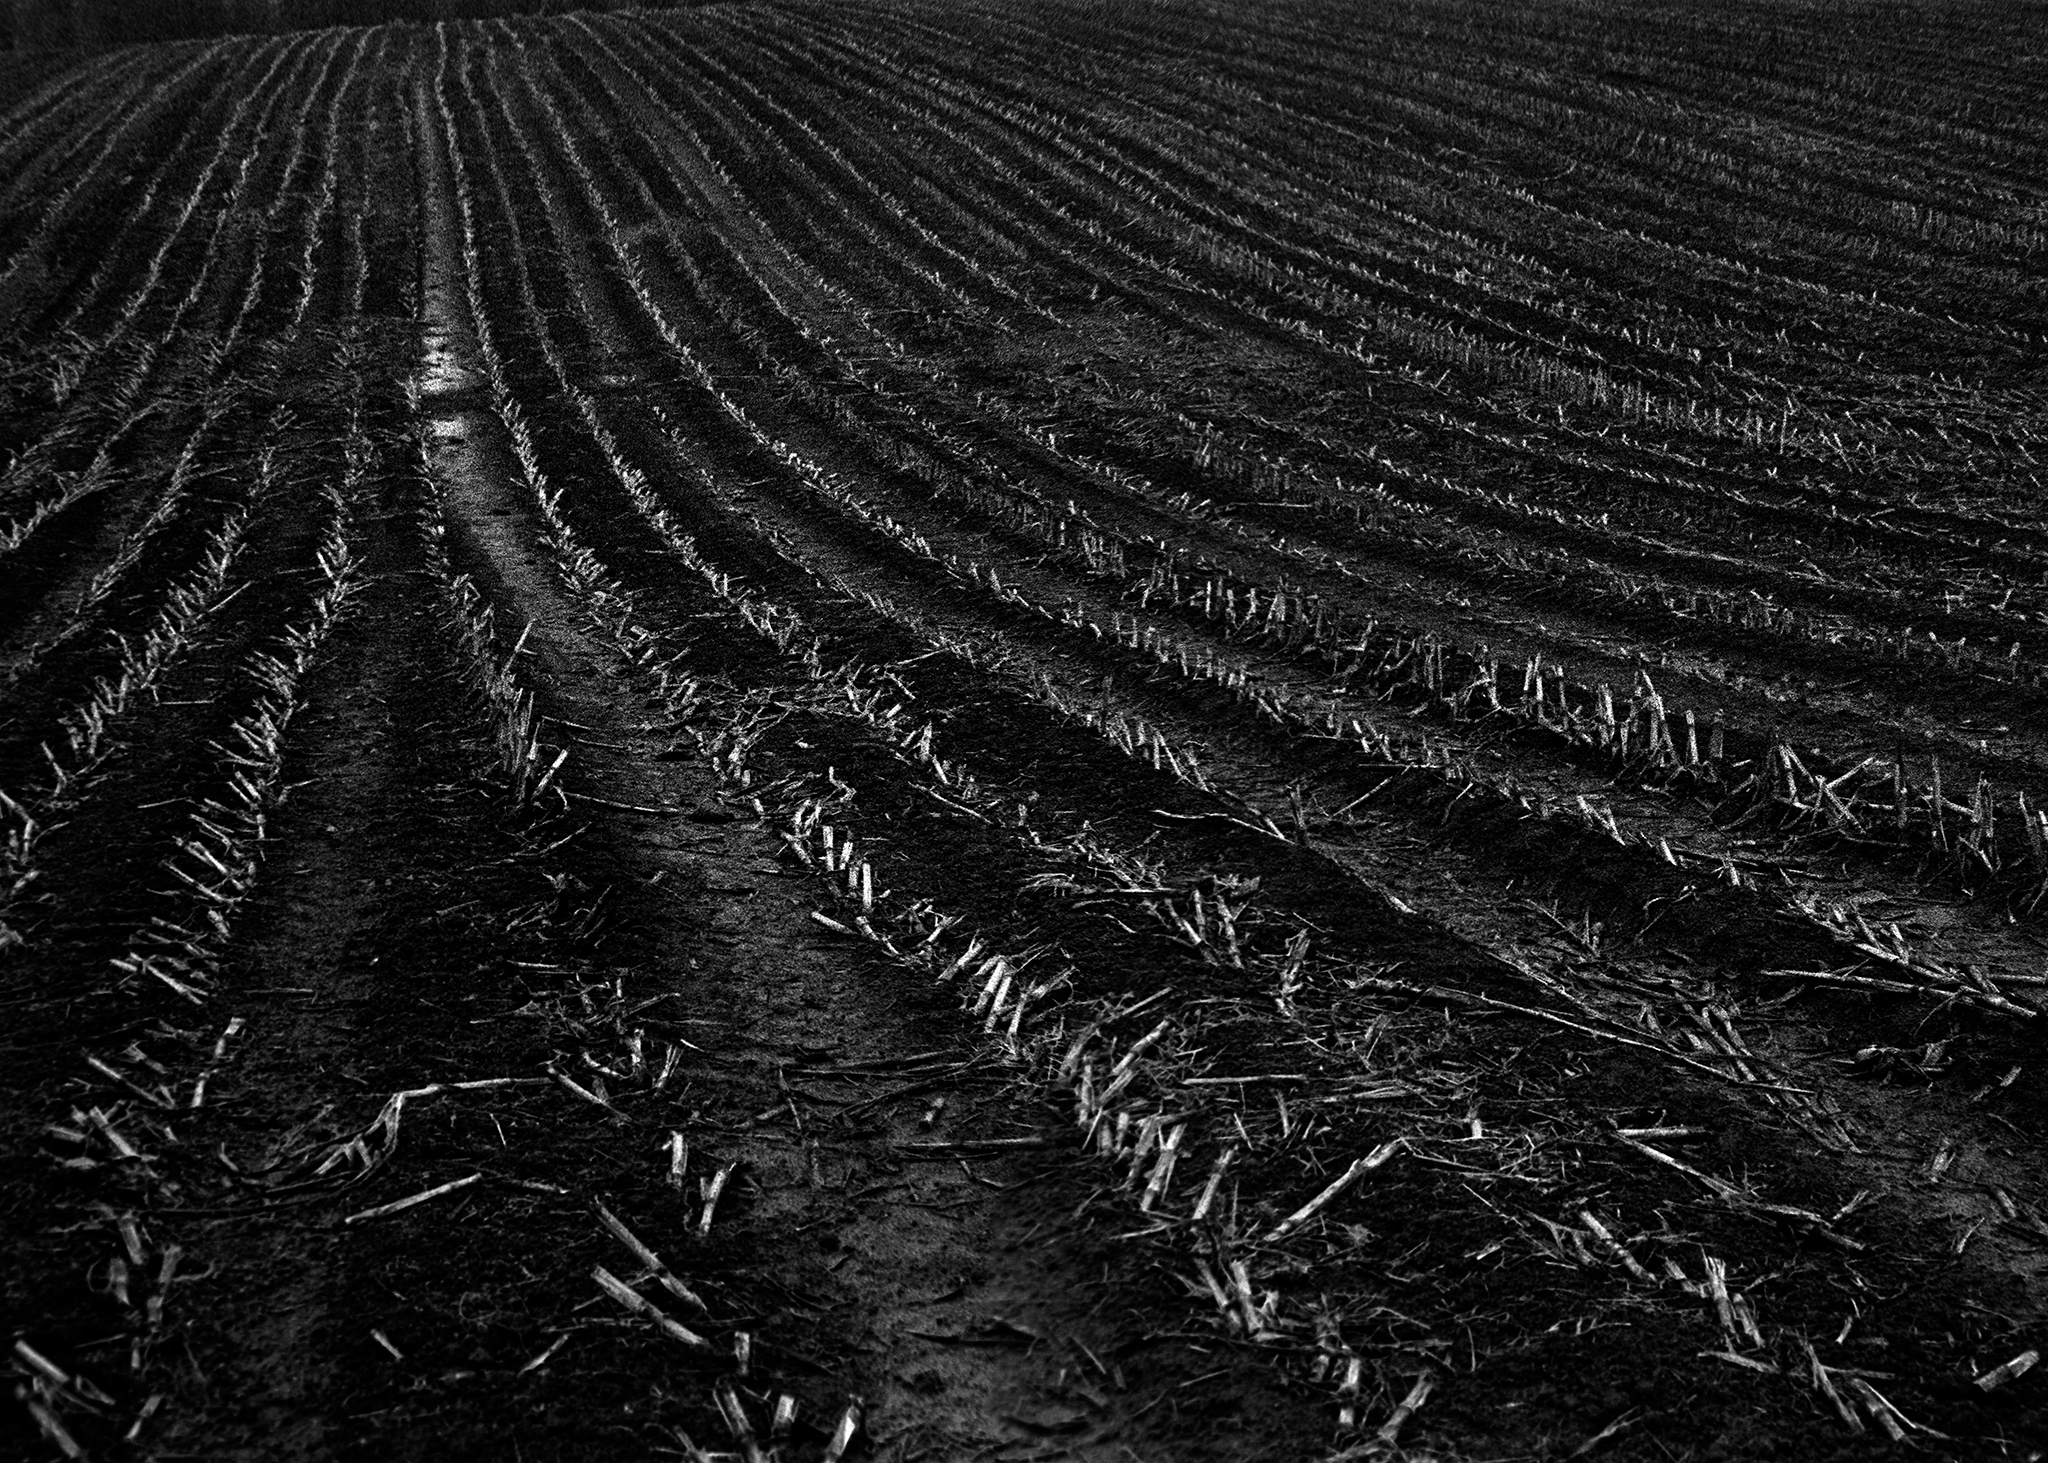
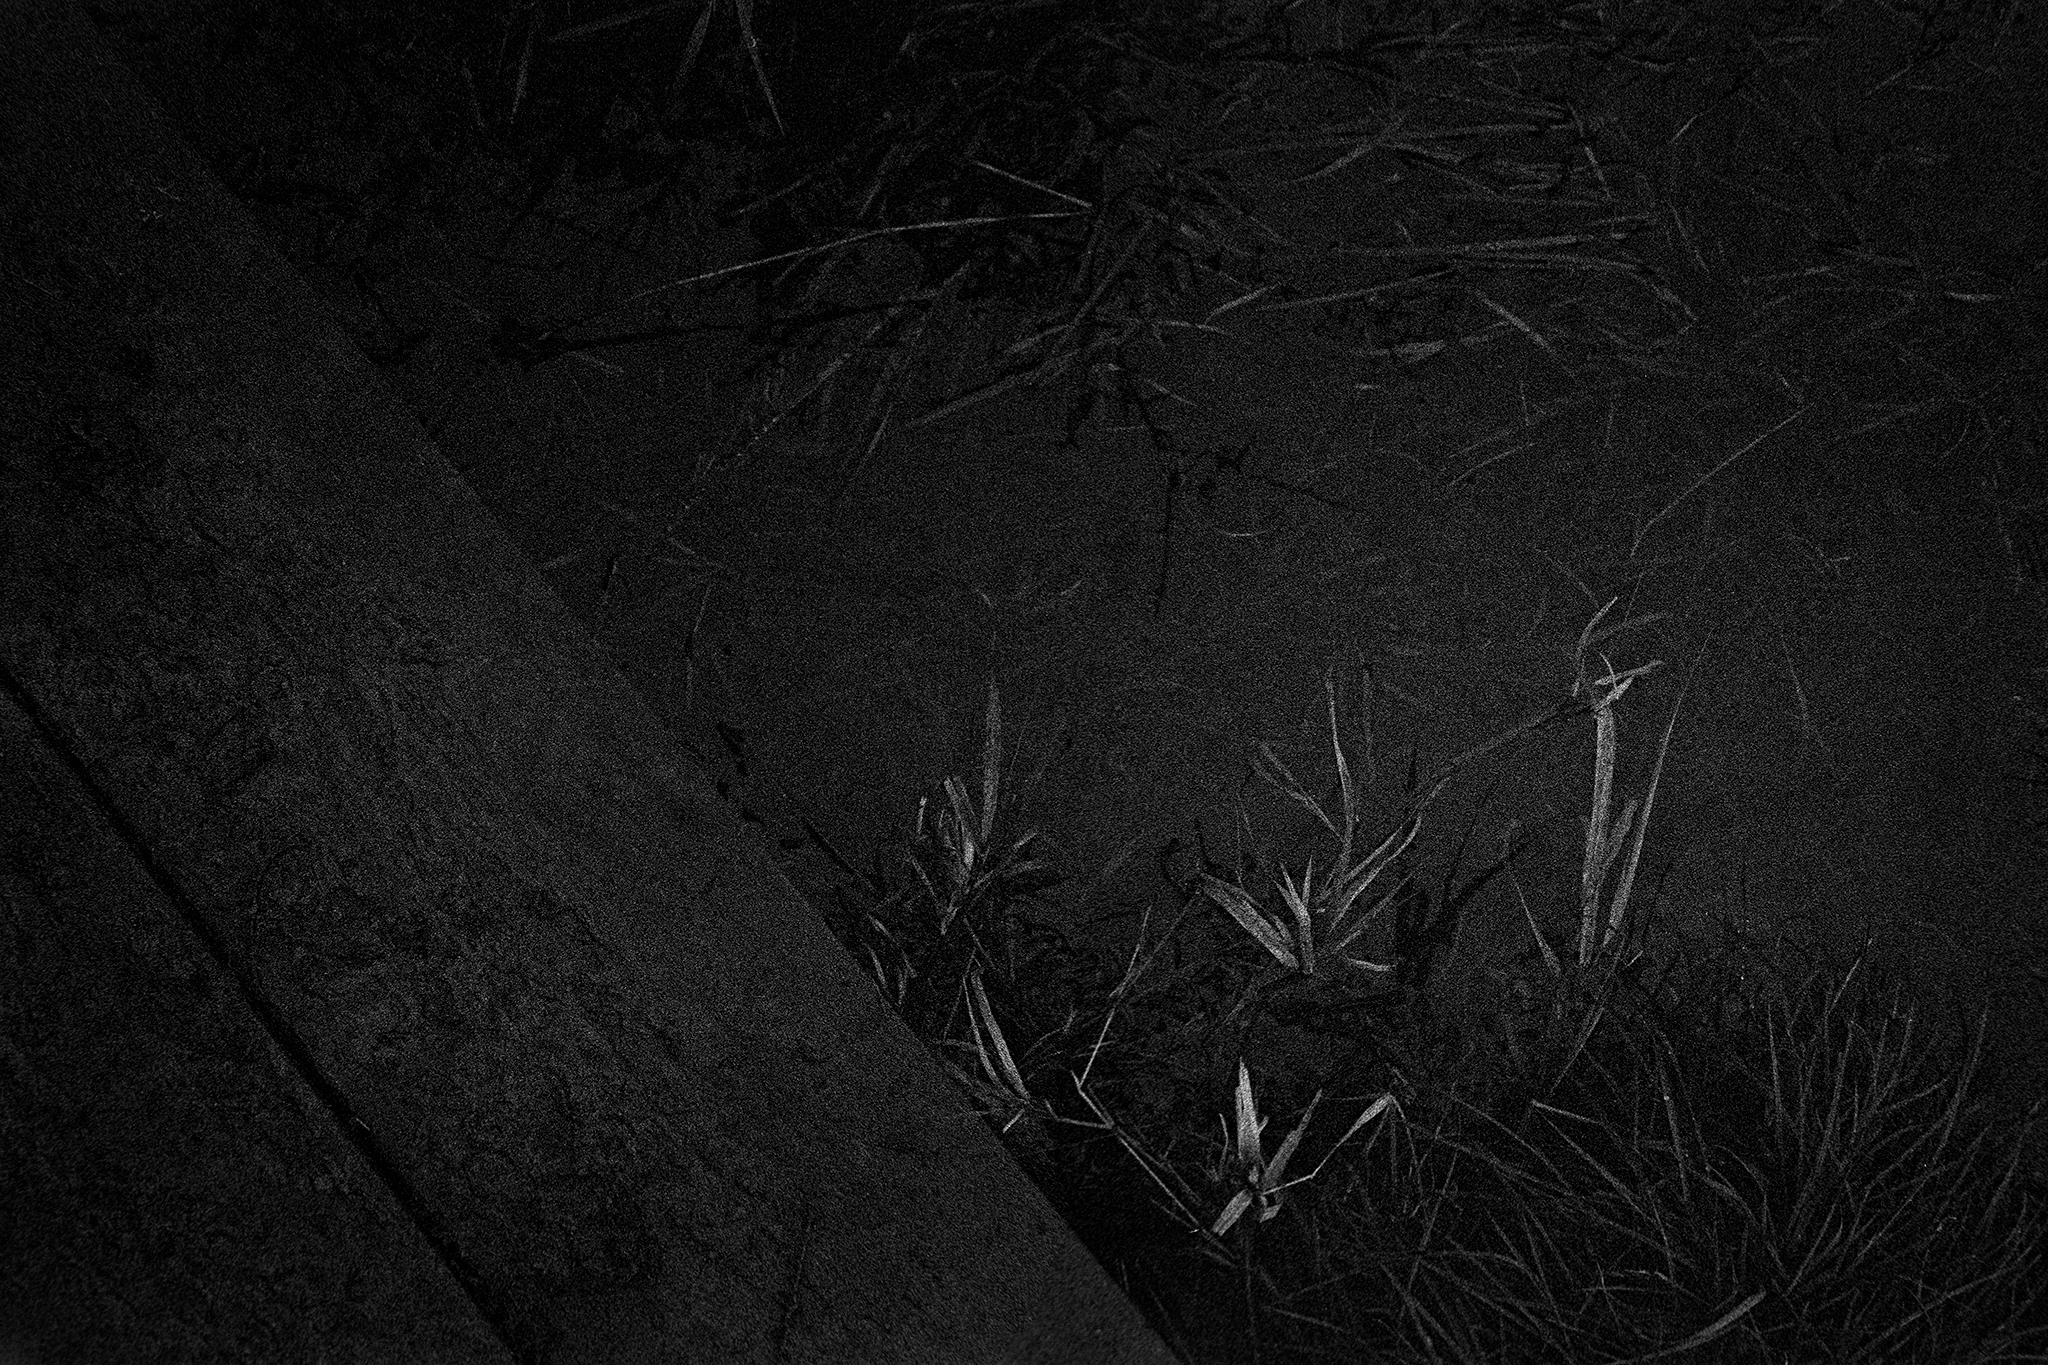
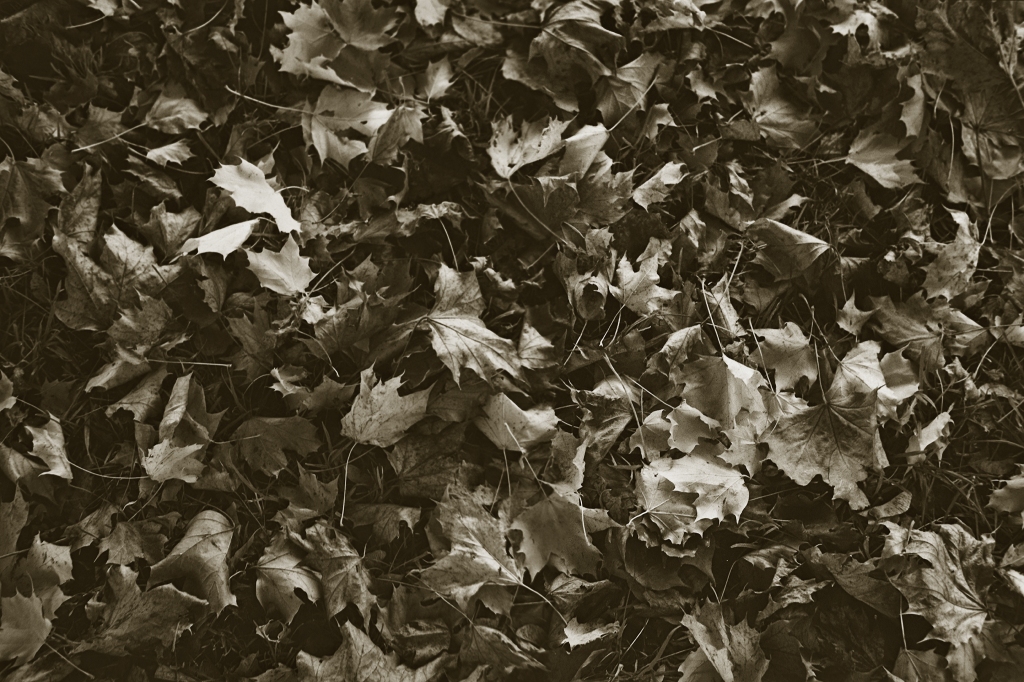
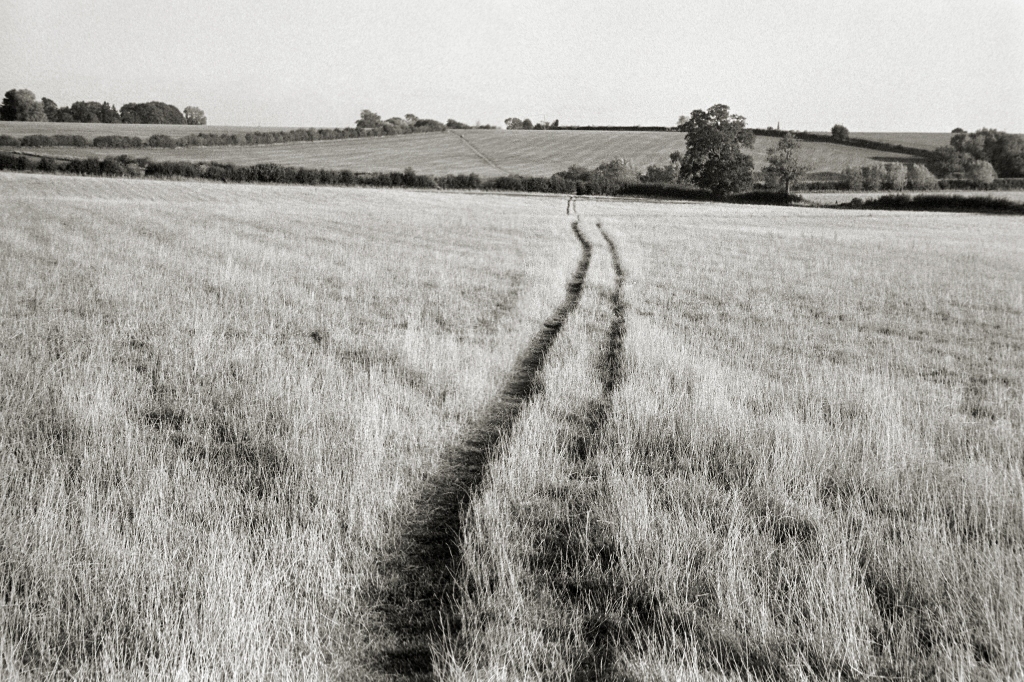
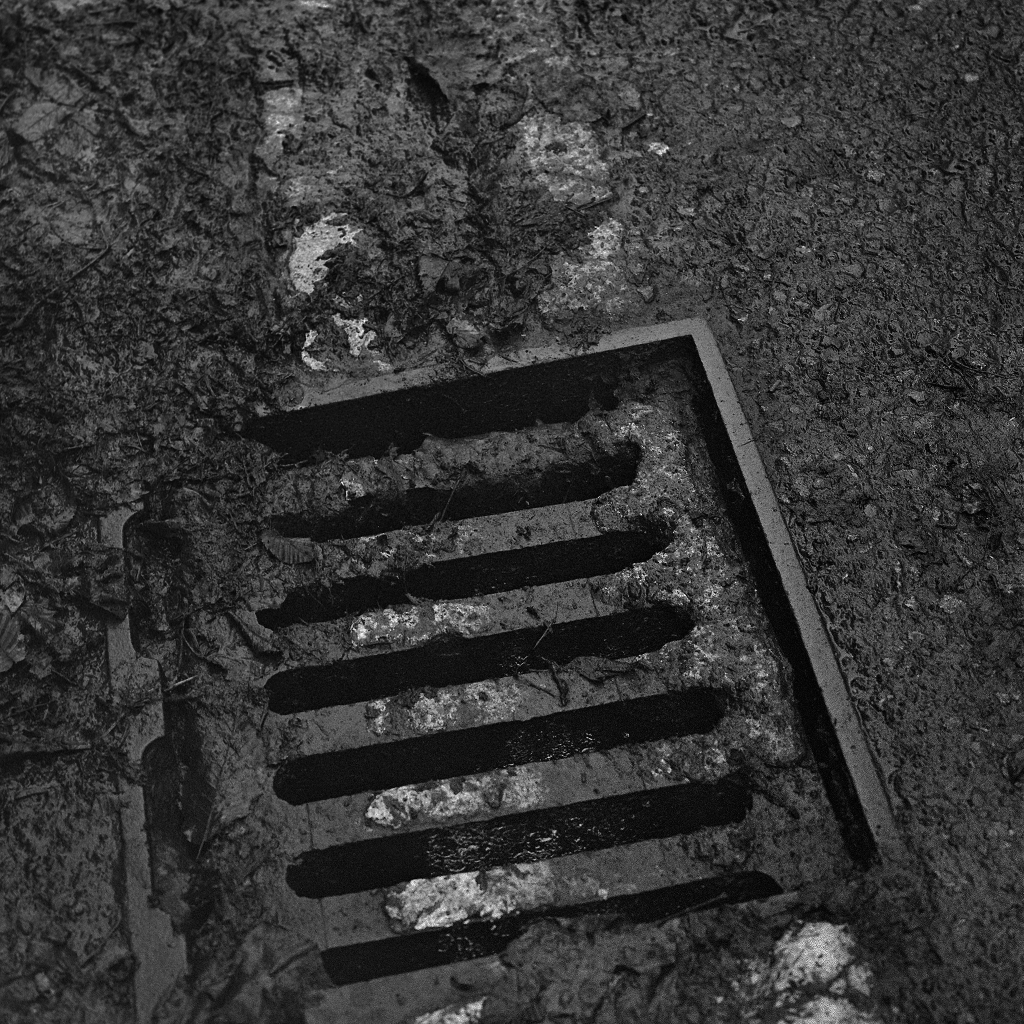
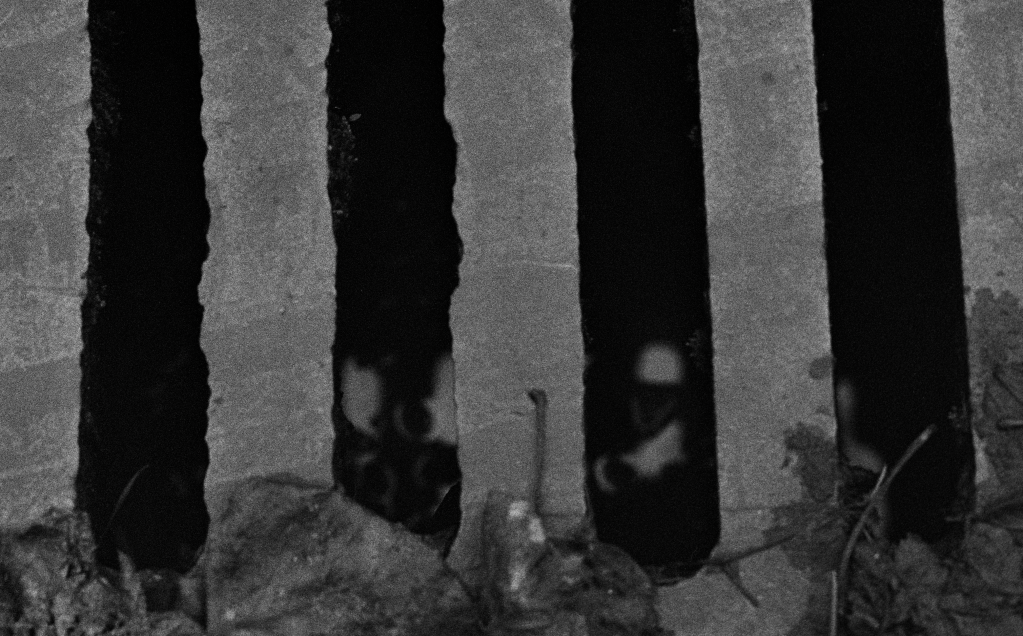
Another in my politicized/acculturated landscapes series – a new subset from local walks in the bleakness of autumn/winter farmland, with neither snow nor frost, but mostly fog and mud, for company.
Local fields seem to have been taken over by maize in recent times, a crop which feels rather alien to Oxfordshire and brings to my mind, for whatever reason, horror in popular culture; what is left behind after harvest certainly feels rather more desolate than the usual stubble. Coupled with extreme grain and small format via 135 Delta 3200, the ritual aspect of farming as process seems to take on a much bleaker, far more forboding connotation, helpfully added by ‘Ritual’ being the title of the original novel upon which the Wicker Man was based. Photography as both recording of time and interpretation of space always seems to convey some inbuilt sense of belatedness at odds with the immediacy of its visual appeal.
Leica M3 / 50mm f/2 dual-range summicron
Ilford Delta 3200 @1600 / 6400
Caffenol C-L/S (80 / 120mins semi-stand)
Enjoy! (But not too much 😉
Developing smaller format B&W film
A couple of good things that have emerged from 2020! Me finding more time, with the right equipment, to make more photographs – via RZ67 Pro II (stolen in 2019, recovered in 2020) and new-to-me Leica M3.
While I now tend to reserve slide film to large format – 10×8 especially, alongside FP4+ – , I’m now getting along well in 120 and 135 with the combination of Kodak Portra and Ilford Delta films. I now process all my colour film at home using the recent Bellini kits, which I’m confident last longer and are more cost-effective than the Tetenal offerings.
For B&W other than the Pyrocat HD I use for 10×8 to make negs for alt-pro as well as digitising, I had previously been using Ilford DDX as my go-to. The drawbacks of DDX are that is expensive, relatively unsound for the environment, and comes from a shop(!). For both 135 and 120 I’ve now moved over to experimenting with Caffenol recipes, which are fun and produce results that so far – when I choose the right recipe – seem to work fine.
For Delta 100 and 400 I’ve had good results with Caffenol C-L/S, which is as follows:
Prepare separately:
21.6g of supermarket soda crystals in 115ml distilled water;
5g vitamin-c powder in 115ml distilled water
5g iodised salt in 115ml distilled water
20g instant coffee granules in 153ml distilled water
(all ingredients inc. water measured by weight on a micro scale).
Leave to stand for a few mins to dissolve while film is loaded into tanks.
With chemistry at 20º, before starting, prewash the film in the tank at 20º for 5 mins, then develop as follows:
Delta 400 @400 – stand development
total dev time 60mins, with gentle agitation for the first minute.
Delta 100 @100, and Delta 400 @800 – semi-stand development
total dev time 70mins, with gentle agitation for the first minute, and 3 inversions at half way.
Delta 3200 pushed at least one stop:
in 135 I’ve had OK-ish results with Delta-STD as below:
32.4g soda crystals in 150ml water
10g vitamin-c powder in 150ml water
22.5g coffee in 200ml water
developing time: 15’50”, with 5min prewash as before.
10 inversions initially, then 3 per subsequent minute.
However, my emerging sense is that Delta-STD doesn’t work that well with Delta 3200 – my rolls of 135 were still rather underexposed; I used this mix to develop a roll of 120 exposed at 1600, with a developing time of 10minutes. While I’m not convinced that the chemistry was at 20º, the roll came out blank.
So for 120 I’ve reverted back to semi-stand with the C-L/S recipe. For 1600 EI I developed a roll for 80mins, with 3 inversions at 40mins, and this looks like a solid baseline to begin from, since I have good shadow detail.
For all the above, I finished off the processing with a 1 min stop-bath of water, 5mins of fixing with Ilford Rapid Fixer, 3 sets of inversion-washes using the Ilford method, then a final Ilfotol rinse before hanging to dry.
Delta 100:
Delta 400:
Delta 3200 (Leica M3 / Delta-STD)
Delta 3200 (RZ67 Pro II / C-L/S)
100% crop of digitisation
Why the Leica M3 is the perfect companion to 10×8
I’ve recently added a Leica M3, with 50mm f/2 dual-range summicron, to my array of film cameras. This is intended to ultimately replace the Hasselblad 500C/M I bought last year to replace my stolen Mamiya RZ67, now that – perhaps the only good thing to happen in 2020 – the latter was recovered and returned to me by the police.
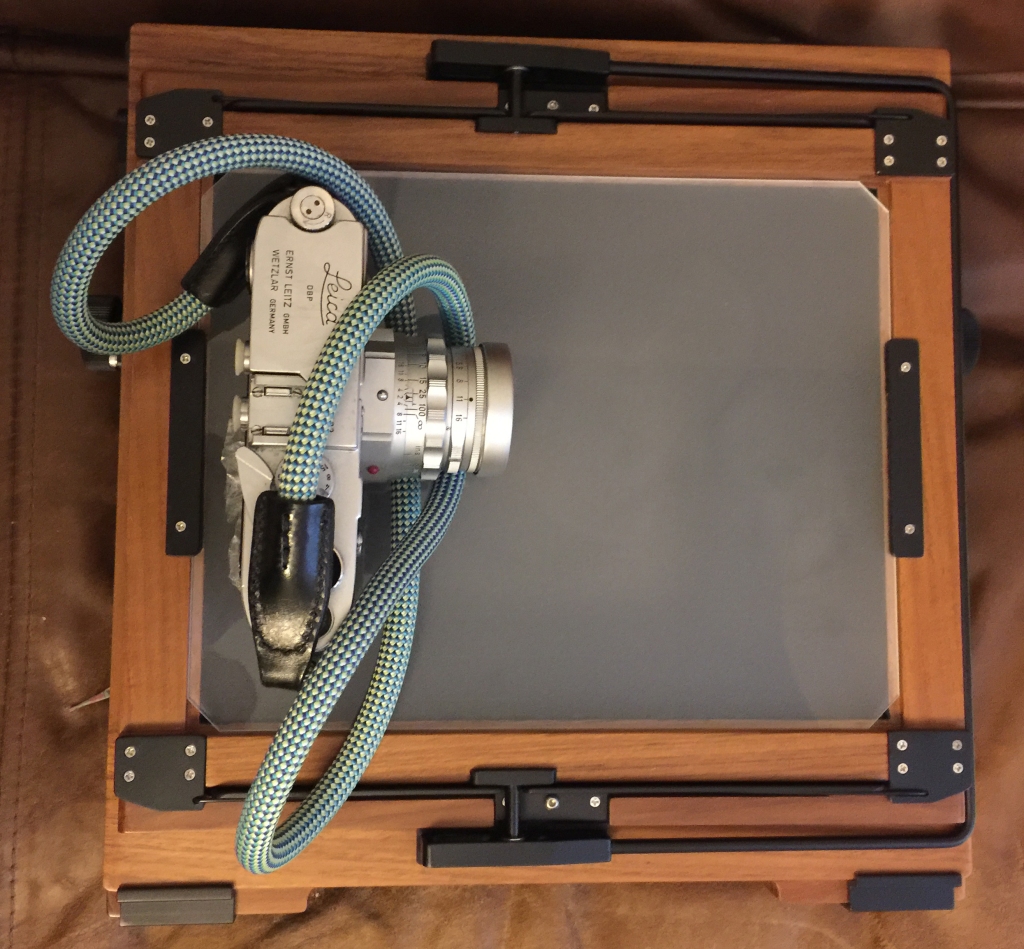
With careful processing and scanning, I’m fairly happy that for my purposes 35mm film on a Leica won’t short-change my results terribly if/when I sell the Hasselblad. Neither camera has a meter so there’s no difference there; I’m generally happy either to use my phone app for everyday shooting or use my Sekonic spotmeter for a specific project or film where I want to be extra-careful; the dual-range is a great lens for the M3 (or any film Leica before the M6TTL), the only practical way of getting closer than a few feet with the Leica system. For more crowded situations, e.g. street photography or wandering around London, having a meter with e.g. an M6 would be more ideal, but at the moment that’s… less of a problem.
Two potential surprises for non-Leica users are size and weight. The Leica bodies are generally even smaller than my Canon A-1, which is pretty small, esp. compared e.g. to a modern DSLR; and perhaps just smaller than e.g. a Sony A7. Second, the M3 is a solid piece of brass, and, with a traditional chrome brass lens, is quite heavy for the size. Not too much of an issue, of course, if you’re used to rather larger equipment…
But the great thing about the M3 is its simplicity. Compared with later electronic film cameras, such as my Canon A-1, it’s light-years easier to use, because it’s so simple. This means it’s also directly comparable, for me, to the pleasure of using large format. The simplicity is the thing – once you get over the terror of the fact that you have to do some (or, with large format, quite a bit of) work because the camera isn’t going to help you with any settings. Even loading/unloading film in the traditional way via the removal take-up spool reminds me of the experience of working with larger cameras, esp. medium-format. It’s certainly not difficult at all, and not time-consuming either (about 60 twiddles between thumb and forefinger to rewind a roll). If you like working with medium-format film cameras there’s no reason why you wouldn’t get on a with a traditional film Leica.
Another thing that I’m pleasantly surprised by is the rangefinder. The M3 is famous in Leica circles for having the largest magnification viewfinder, so it’s great to work with, with a 50mm lens or longer; shorter than this and you’d want to compose with an external viewfinder, but getting focus nailed with the rangefinder is easy. I’m happily surprised by this because my former experience with a Hasselblad XPan II was less favourable – composing was difficult (the rangefinder patch was a bit smaller), and as a panoramic camera it actually didn’t work that well for me for landscapes since I was forever craving more detail. Using the M3 as a walkaround camera is a much more pleasurable experience; forgetting about maximum detail in favour of the opportunities this camera provides is great.
Whether or not I take the M3 with me on 10×8 trips doesn’t really matter – the M3 can work as a scouting camera in more general terms: getting you out more, putting you in contact with the general kinds of subjects you might like to work on 10×8, and keeping the film-photography mind hard at work, and getting results and shots you could never get on 10×8 in a million years anyway. Very highly recommended.
FP4+ film speed and development testing for argyrotype printing
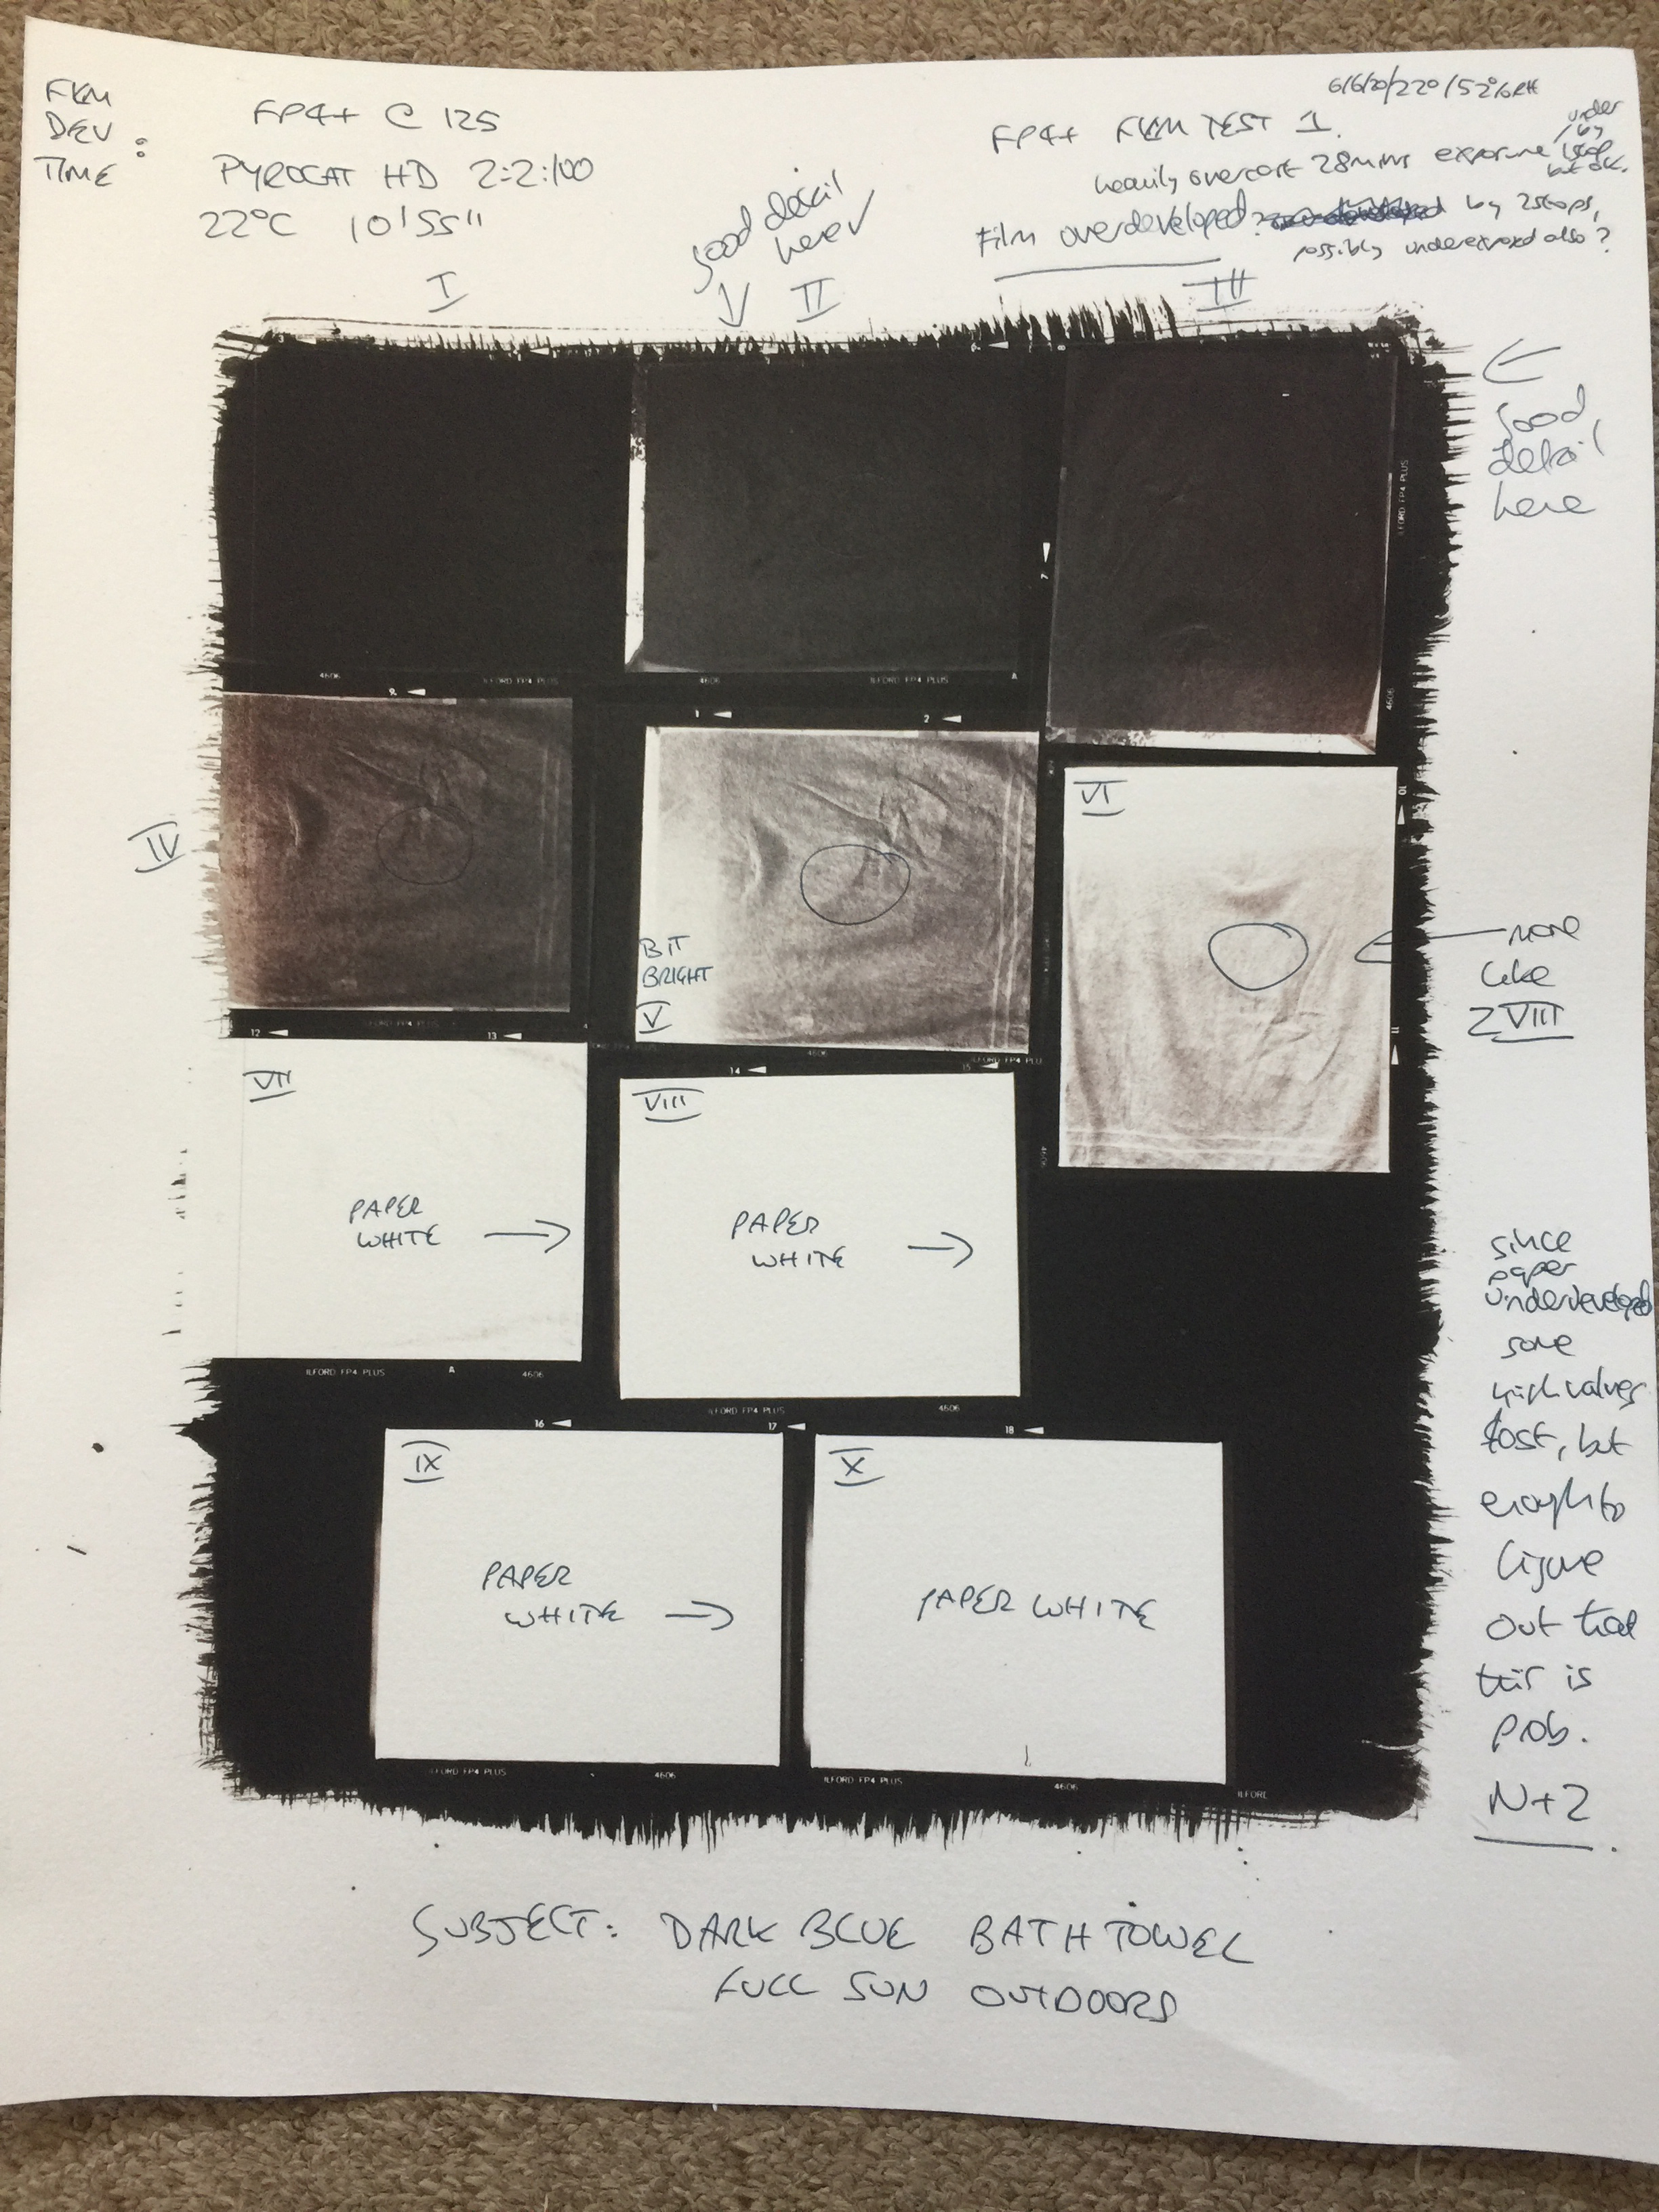
Following recent argyrotype printing sessions, and an increasing sense that my prints were both rather dark in the shadows, and more particularly losing a lot of detail in the highlights, I ran a print test following the guidelines for silver gelatin in John Blakemore’s Black and White Photography Workshop.
I exposed two rolls of FP4+ 120 in my RZ67 Pro II, using a dark blue bath towel set up in full sun in my back garden.
I exposed the film at box speed, 125, and shot a set of 10 zones, starting with zone 5 and then moving from zones 1-4 and 6-10.
I developed the first roll at my currently set development time (Pyrocat HD 2:2:100, 12’ at 21ºC, 10’55 at 22ºC, hand-developed in Jobo 1520 tank, which ought to approximate the results I get with 10×8 in the Stearman with the same time and agitation steps), and then printed it as a contact sheet with my usual Argyrotype set up. The resulting print is set out below, with hand-written notes, clearly demonstrating overdevelopment in loss of highlight detail.
On this basis, I then developed the second roll at N-2, and produced a much more satisfactory result.
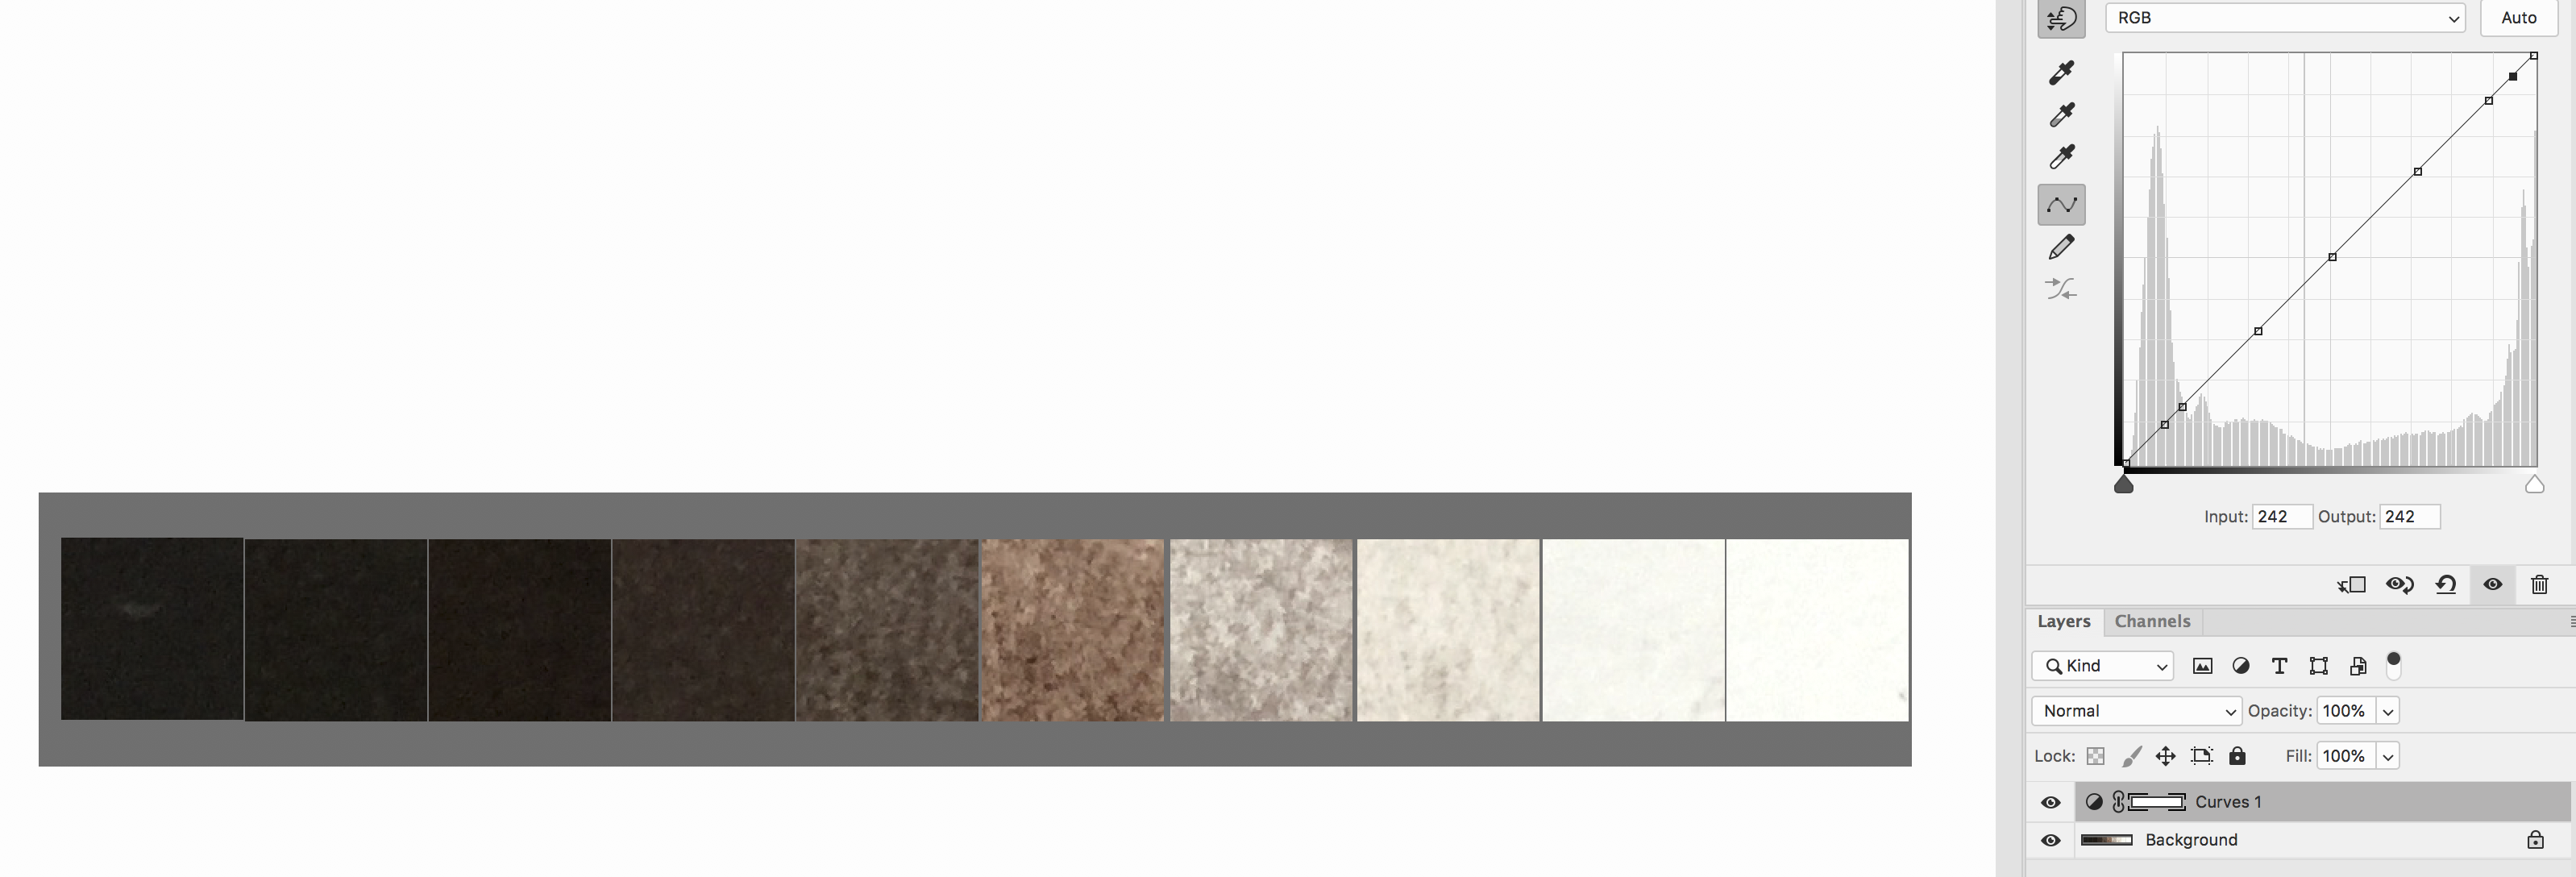
I put quick phone-grabs of both negs in the final wash (before dry-down) through photoshop to produce a pair of zone scales from each print, as follows:

A second image of this strip for film 2 indicates the position of the zones on the histogram (with zones 1 and 2 both on zone 1 and zones 8 and 9 both on zone 9), demonstrating that, before dry-down, my zone 5 on the second sheet is a little dark, more like zone 4, and that zones 1-4 are probably one zone lower than where they should be, representing underexposure of the film by one stop:
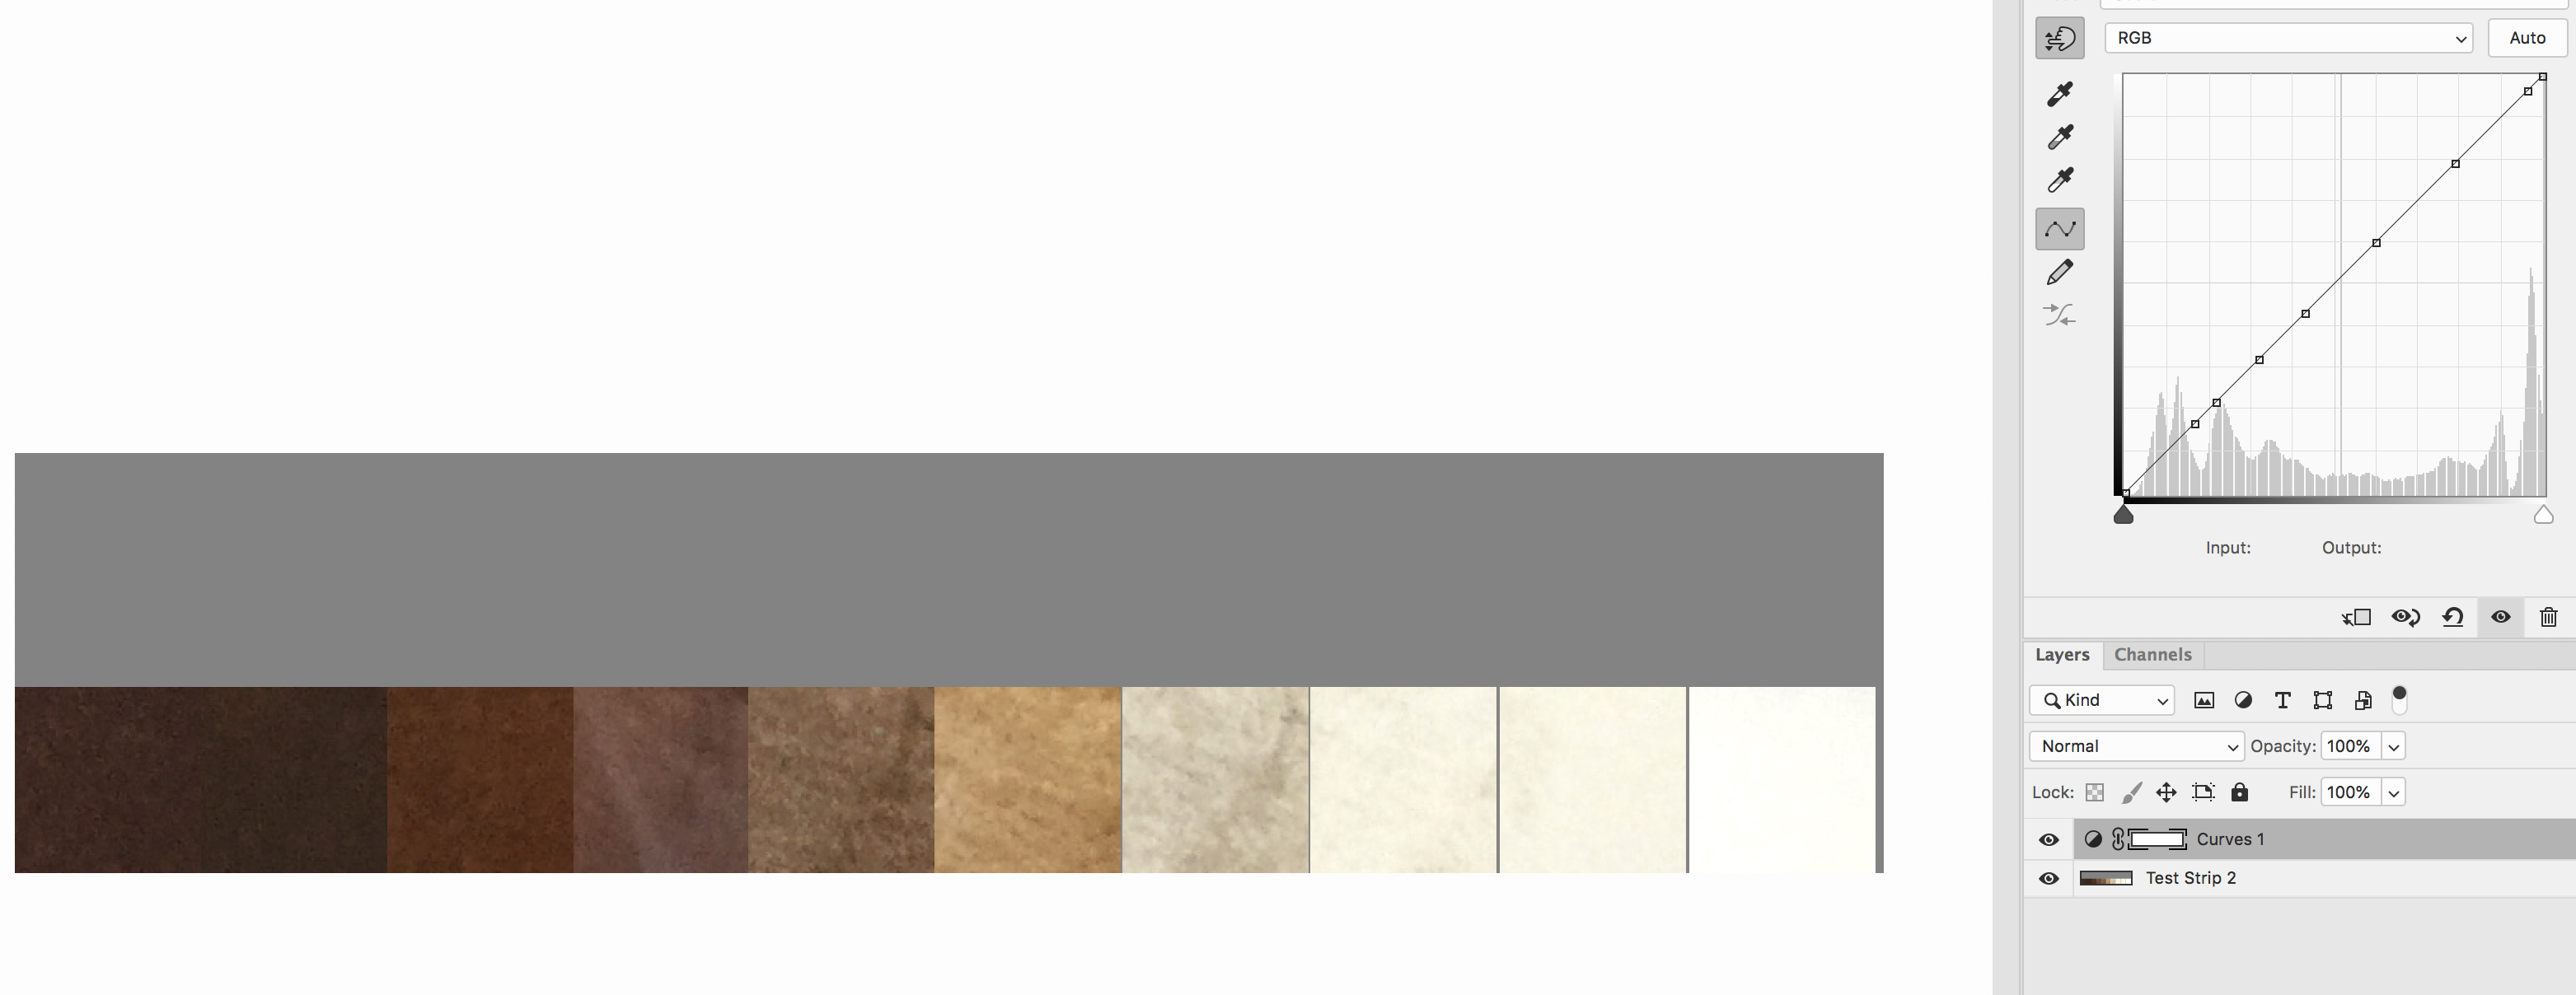
And here is the same strip when the paper had dried.
This also indicates that I should rate my film at 64 for argyrotype prints with full tonal values starting from zones 2-3. I’m more bothered about loss of highlight detail than loss of shadow detail, so dev time is more significant I think. An extra stop of exposure on 10×8 will be quite substantial, but for images where full textural detail will be important I will want to be as creative as possible and go with 64 as film-speed if circumstances allow.
Here is the original contact sheet, now dried, from the second film with revised development time of 8’05” at 22ºC.
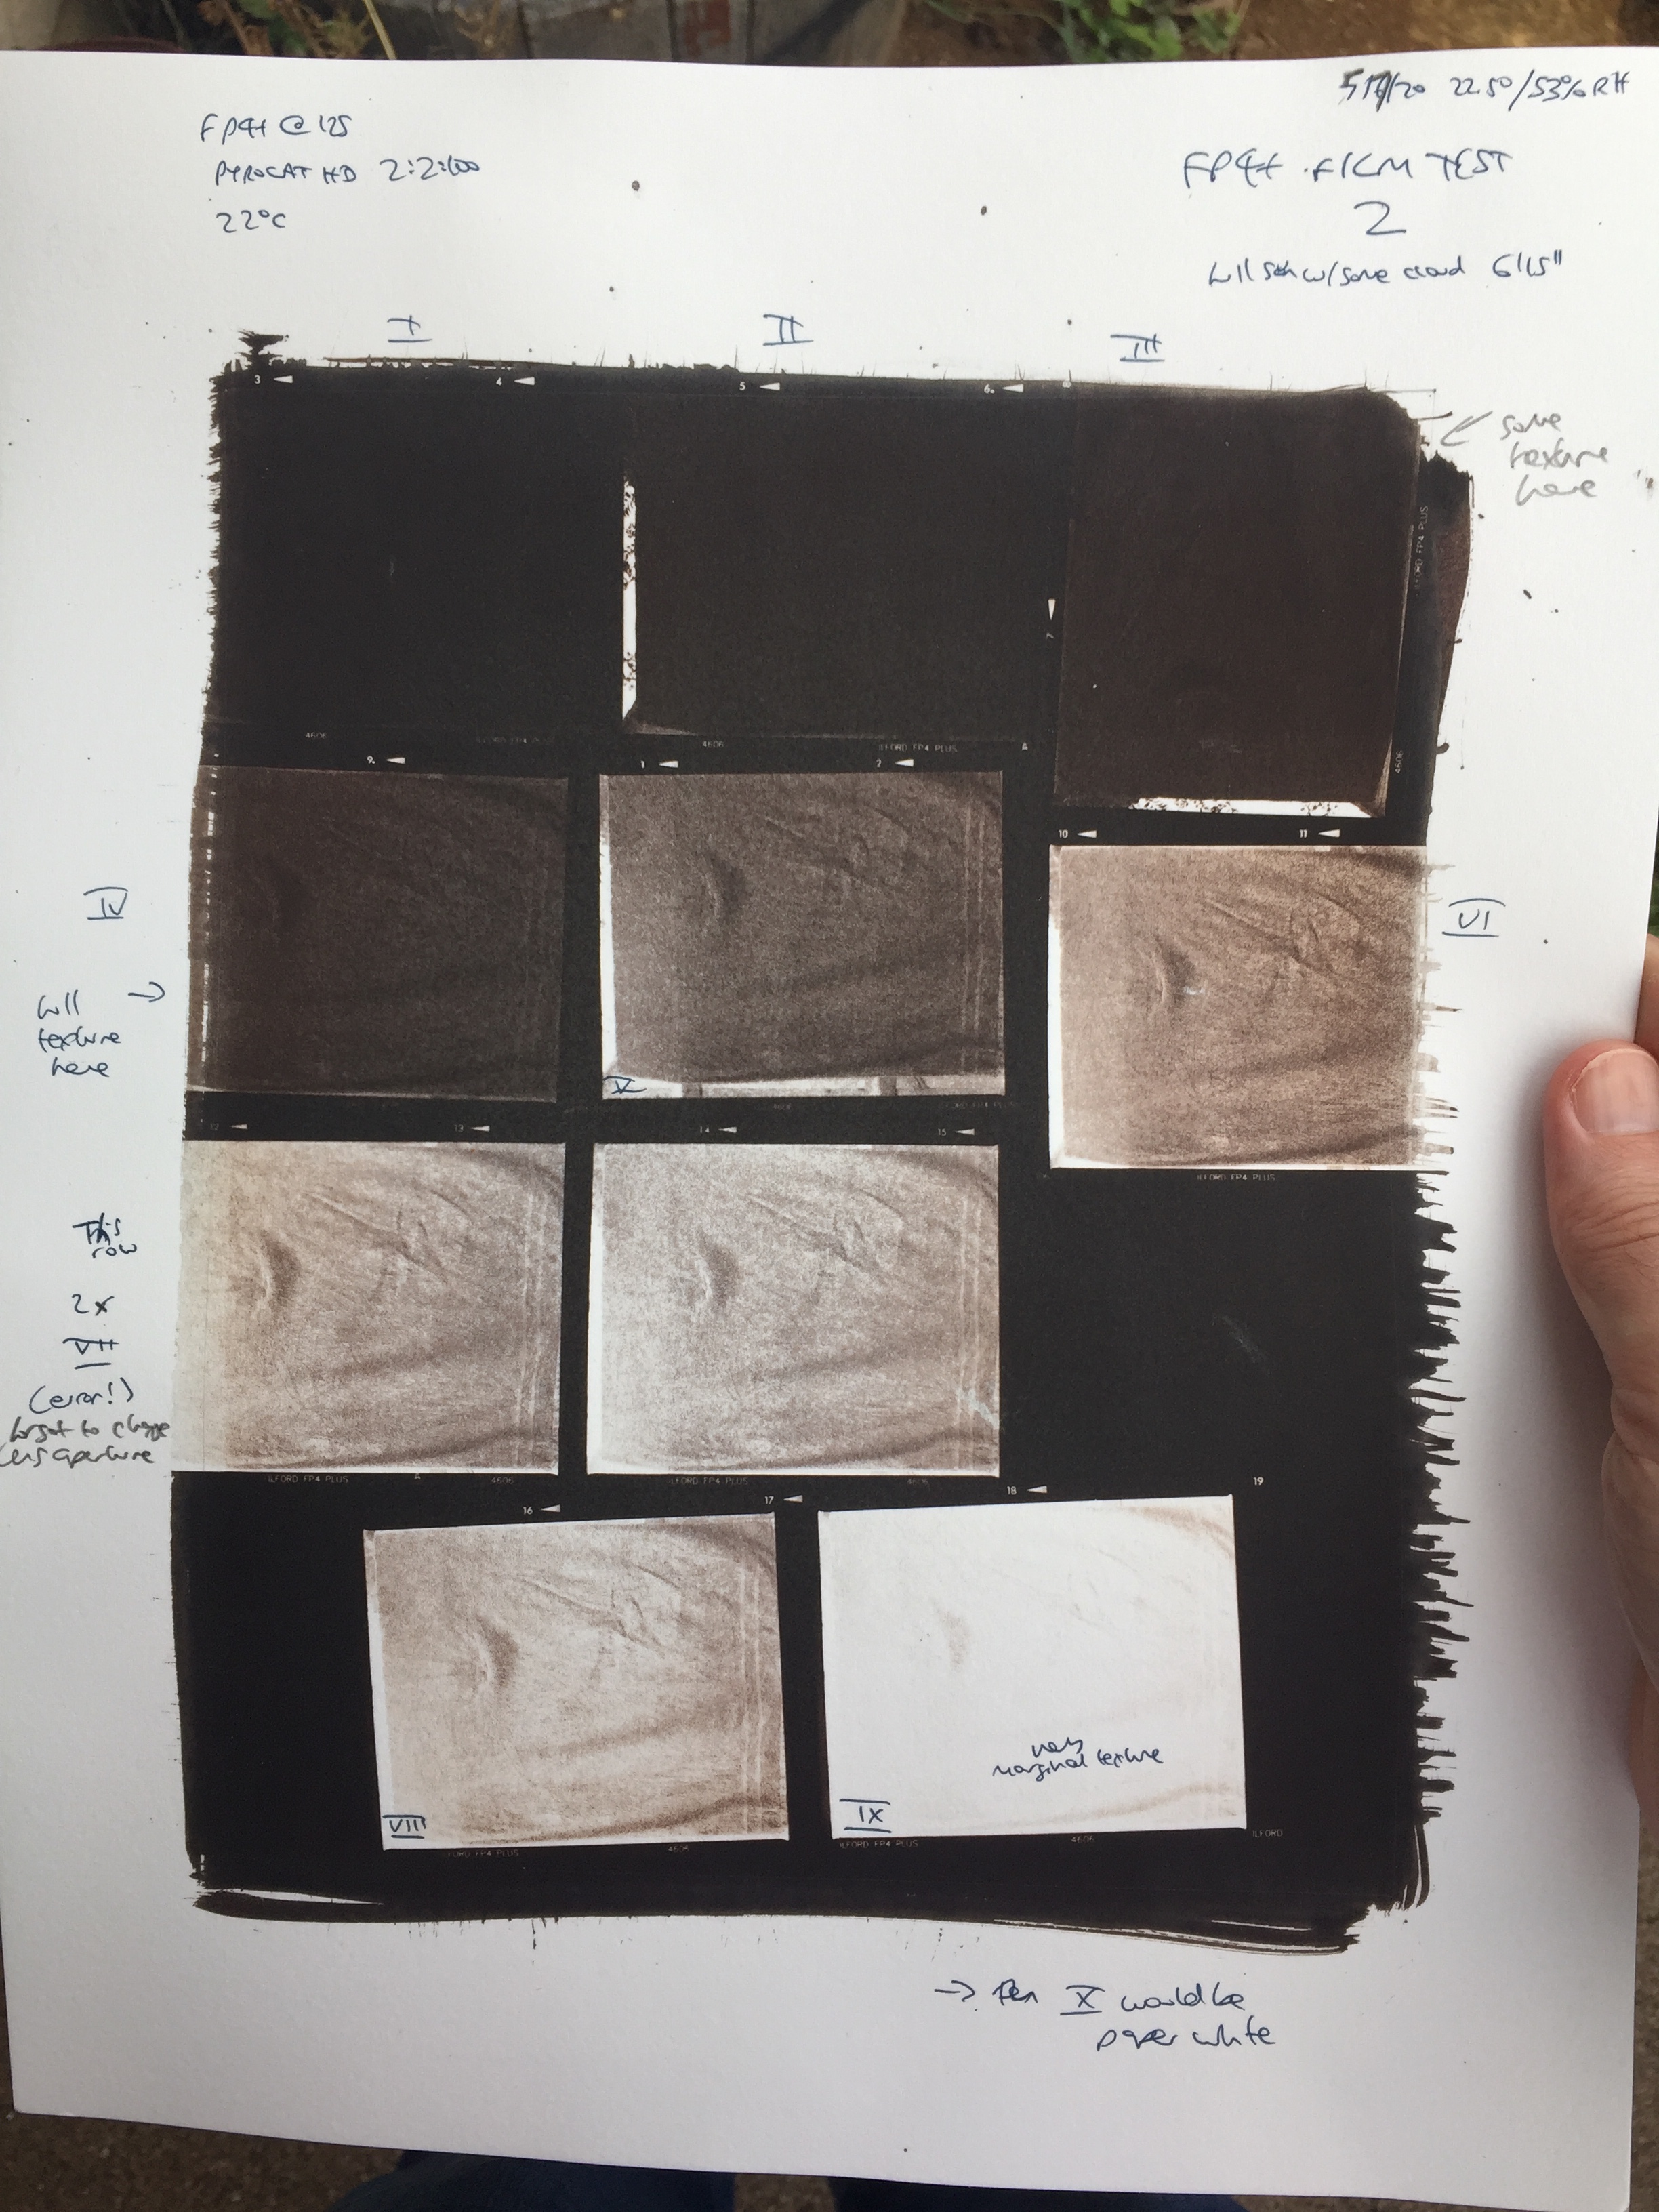
So new N dev = Pyrocat HD 2:2:100, 8’05”, 22ºC, ideally rating FP4+ at 64 where possible. Film hand-developed in Jobo 1520, to replicate as closely as possible the time and agitation I use for 10×8 in Stearman SP810 trays.
(NB I made an error in making the original exposures here: I shot two at zone VII, forgetting to change the lens aperture between shots at that point, so the two images on the penultimate row represent the same tonal position – their different colour represents slightly different sensitiser coating depth; I ran out of exposures on the roll, so the test finished at zone IX, which has very minor texture, from the shadows on the towel surface; zone X would be paper white).
Shooting a test with a textured subject, as John Blakemore recommends, makes a huge amount of sense.
The peach mid-tones here are very pleasant, and are controlled by the amount of humidity in the paper at time of exposure.
Altogether a stimulating and productive test. Will now to try it out on some new 10×8 subjects.
Recent Comments
Studio Arago on Lockdown Macro with 8… The Evolving Natural… on Lithika, Dinorwic George Sheils on Experience, Effort, Power, Dep… Simon on New and Old… dwf on Large Format Diaries
Images from my Flickr Account


