
New home-developing notes for 10×8 sheet film
After many months of not being able to get out to expose 10×8 film, I’ve now made two outings in the last few days, and using the opportunity to progress with my setup and equipment.

FIrst, I’ve been able at long last to expose some of the new Portra 160 I bought three boxes of a while back.
Second, I’ve taken my home developing, inc. of colour, to the next level, by purchasing a Jobo 3005 expert drum and Jobo 1509 manual roller base (and the pump needed to remove the lid safely).
My home developing with 10×8 has thus progressed from BTZS tubes (which I still have but haven’t used in over a year) and two Stearman Press SP810 trays. The latter are brilliant and a huge improvement over the BTZS tubes for ease of use in a minimal home setup (NB I don’t have a darkroom or even, particularly, the opportunity to set one up).
The Stearman trays work perfectly for both B&W and colour following some experimentation, and are especially useful for B&W when you have two different development times for a couple of sheets.
However, esp. for E6 colour with the Bellini 6-bath chemistry I now use, where the overall processing time not including setup is about 45mins, the Stearman trays thus have their limitations if you have multiple sheets to process – even two sheets, with two trays, takes up a whole evening.
Last night I processed all three of my exposed sheets of E6 Velvia 50 in one go in the Jobo 3005 (which can take a total of 5 sheets). Tonight or tomorrow I will aim to process the Portra 160.
The expert drums are really designed to work on the large Jobo CPP processors: sadly my processing area and wallet are both too small to allow for such a monster. But all is not lost, as long as you understand the process and do your research (via e.g. Youtube, blogs, and LFPF). Fingers crossed, I seem to have developed the E6 sheets in the new Jobo tank at least as well as in the Stearman trays (or in smaller Jobo inversion tanks for 120/35mm).
Now that I have my waterbath setup resolved for both C41 and E6, adjusting to the Jobo 3005 is a matter of getting comfortable with manual rotary processing rather than sloshing/inversion, and setting up a rig to get the chemistry into the drum when horizontal.
Both of these are very important for even developing: the bonus of the Jobo is the minimal chemistry it requires to process the sheets, but this comes at the cost of needing to ensure that the chemistry engages with the sheets evenly throughout – this rules out pouring in the chemistry from the top, for instance, as with smaller tanks for 35mm and 120. The expert drums have an internal design completely different from all of Jobo’s other tanks: the 3005 has five internal tube chambers, each carefully designed to allow chemistry to reach both sides of the film for developing, and thus the tank also fills in a way slightly differently from the other jobo tanks, with a modified lid baffle. So ensure the work surface you are processing on is as level as you can get it. I got this to work pretty well just with the basic Jobo 1509 manual roller base, by adjusting the level of one end by different thicknesses of dish cloth.
The equipment you’d need to get the chemistry into the horizontal tank calls for a bit of ingenuity but not any particular tools, and could be very easily assembled from packaging and some plumbing pipe, and again a bit of figuring out. I went with a washing machine waste hose cut to length, pushed though a waste elbow joint, held perpendicular at the right height by packing material from a laptop box cut to the right shape and then gaffer-taped together. The entry width of the Jobo cog lid is 1inch, so a tube that is smaller than this in diameter will be needed to allow the tube to pour chemistry into the lid while the tank is rotating. The washing machine waste hose is flexible plastic, easily cut to size, and of a large enough bore to allow the chemistry to be poured into the tank relatively quickly without the need for a funnel – for colour chemistry you need to try to maintain the temperature so too many other bits of plastic in the way risk cooling it too much.
Chemistry volumes, drain times, and rotation method/speed.
I found that the 3005 tank takes 20 seconds to drain 600ml chemistry, the amount I plan to use for colour (I will need a full litre for B&W because of higher dilution) – I have the full litre of each step made up and decant from brown plastic/glass bottles to clearly labelled Jobo pouring bottles.
Although the 3005 can take five sheets, a max of four is a good idea because, at least for the Bellini kits, you have to extend some of the times after four sheets/films because of chemistry exhaustion (the Bellini E6 kit lasts for up to 8 sheets/films; the C41 up to 16). I was able to pour the 600ml of each lot of chemistry carefully into the tube in about 20seconds, pouring from the Jobo bottle with my right hand while carefully rotating the tank with my left. The FirstDev time is critical for exposure, so you have to time precisely from the moment you start pouring the chemistry in to the moment the first wash water comes into contact with the film: this is why it’s important to know the drain time of the Jobo tank (so you know when to take it off and start draining the developer, ready for the water to enter when the timer goes off – as usual, I am using the excellent Lab Timer app on my phone). The timings for the remaining steps are not critical if you go over, because the other chemicals do not continue to work after their allotted times.
Because I have my water bath at 40ºC, use a 1minute 40ºC water prewash before the first developer, and am confident of the thermal profiles of both the Stearman and Jobo equipment, I haven’t adjusted my developing times at all.
Rotation method: after carefully rotating when adding chemistry, I spin the tank quite rapidly ten times in each direction, going past a full rotation each time: thus perhaps about the 50rpm the automated setup seemingly achieves). Rotating in each direction, and being conservative by using a larger volume of chemistry than the minimums, guards against uneven development.
Other notes from my first go:
Loading: the 3005 is comfortable to load up in my Harrison Jumbo tent, though this is done with the tank horizontal. You then set up the tank vertically, with the tent on a firm surface, to press the lid on as evenly as you can.
Final wash and stabiliser: for the last tap water rinse before stablizing, remove the lid of the tank with the pump. The tank with lid on will not fit under the mixer tap of my kitchen sink with lid on, but does just fit with lid off.
For the stablizer step: here I’ve I think gone with Bellini’s own recommendations. I premix a big batch of stabiliser by removing 50ml distilled water from a 5litre bottle and adding 50mm of the concentrate. During the final running-water wash of the film in the tank, I pour 500ml of the stabiliser mix into a jug and then pour into a white washing-up bowl (white allows me to see the colours in the film). When the washing time in the sink is over, I remove the film carefully while the water is still in the tank, and then put all the sheets in the washing up bowl stabiliser. For the first minute, I agitate constantly, rotating the sheets. After the first minute, I then discard this first 500ml, then repeat a further three times without agitating, but rotating the sheets a few times. I will probably do the same for C41 stabiliser. Too much agitation produces too many bubbles, which you don’t want to have dry onto the film. I then hang to dry overnight; I have been toying lately with the idea of a film dryer to speed up this step as well.
Fingers crossed for C41 and B&W; will hopefully post some images/results once the sheets are scanned.
Meanwhile, here are a couple of pics of my Heath Robinson pouring rig. The basis of it is a plumbing waste pipe elbow connector, gaffer-taped to a piece of LDPE packing material from a laptop box, measured and carved to fit with a knife, then gaffered to a waste piece of plastic as a base. It’s quite light but stable, and the neck of a jobo pouring bottle can be made to touch the top of the washing machine hose tube to add further stability to the pour when your other hand is rotating the Jobo tank.
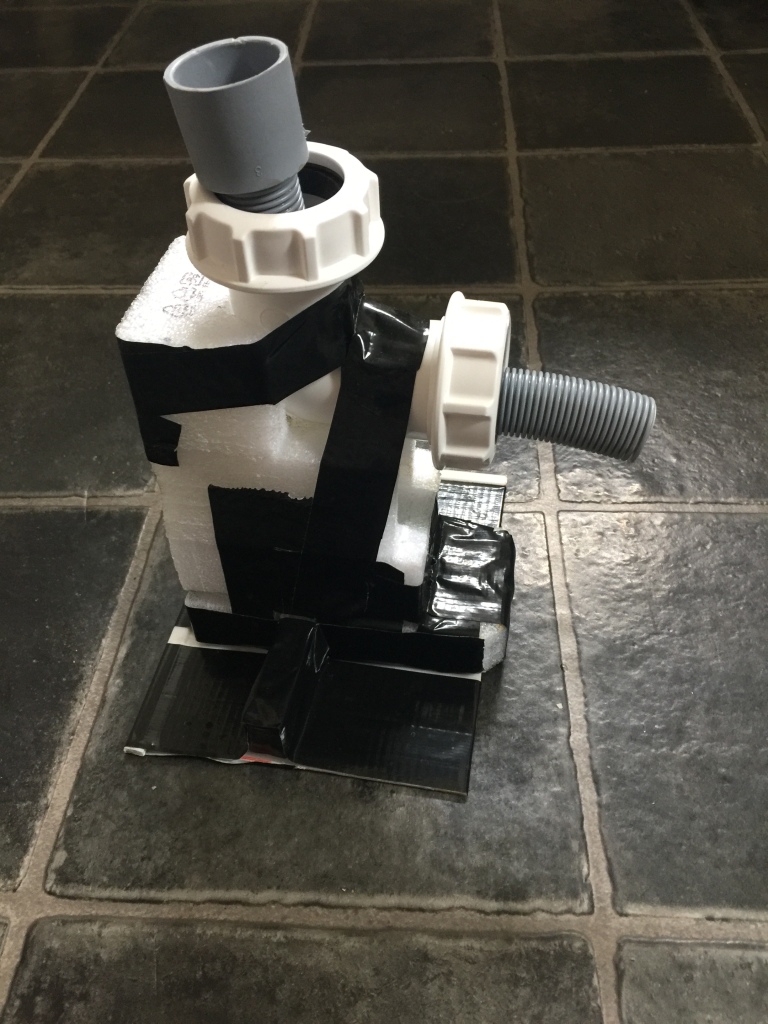
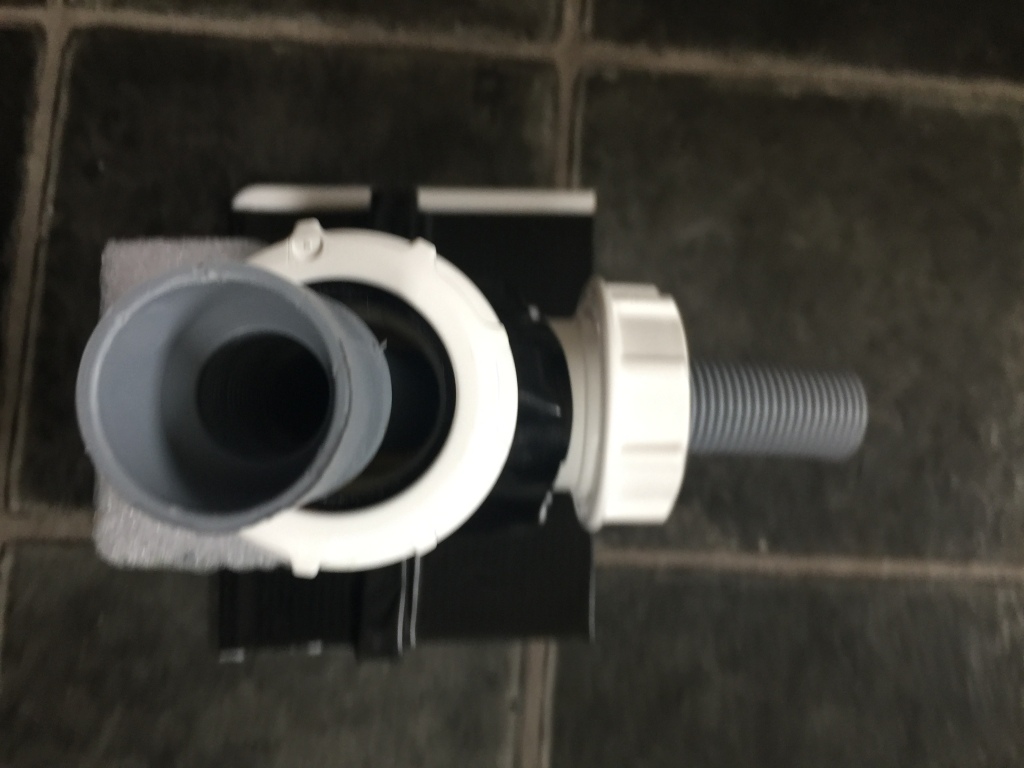
Update:
The pouring rig works well, but I will start using a funnel to avoid drips and to allow a more constant pouring speed and rotation speed. This seems especially important with C41: the first of the two sheets in the Jobo tank that I have scanned had some fairly drastic streak marks, and an uneven rotation speed may be partly to blame. Another solution I’ve read of on the LFPF is that 2x one-min pre-washes at the start of the process may be needed (currently I only do one). The rationale for this is that the pre-wash softens the emulsion and allows the chemistry to have more immediate impact. This is even more important with C41 than E6 because the important developer stage is only half as long with C41.
One further note: my recent C41 sheets, two in the Jobo and one in the Stearman, all exhibit fine scratches length-wise along the sheets, visible at 200% after scanning. I’m pretty sure this must be to do with the stabiliser step, and I think the white washing-up bowl I use for stabizer may have a rough section. I’ll either sand this down, or get a dedicated 10×8 paterson tray for the purpose. I’ve never experienced this with any other film sizes I’ve home processed (135 to 5×4) so this may be the culprit.


